
Think the blue line is a wall that kills every attack?
It doesn’t have to be.
At youth levels the right entry, carry, dump, or pass, decides whether you keep the puck or give it up.
This guide shows clear, age-appropriate choices, drills, and timing so players cross the blue line with the puck and create chances.
Read on to learn simple reads, when to sprint, when to rim it, and how to teach entries that turn momentum into goals and wins.
Core Youth Concepts That Guide Successful Offensive Zone Entries

Offensive zone entry at youth levels does one thing: gets the puck into the attacking zone without losing it. Young players see the blue line like it’s some kind of force field where plays just die. Teaching entry strategies shows them the line isn’t a wall. It’s a choice point. Cross it with the puck, make defenders move, and create space for teammates to score.
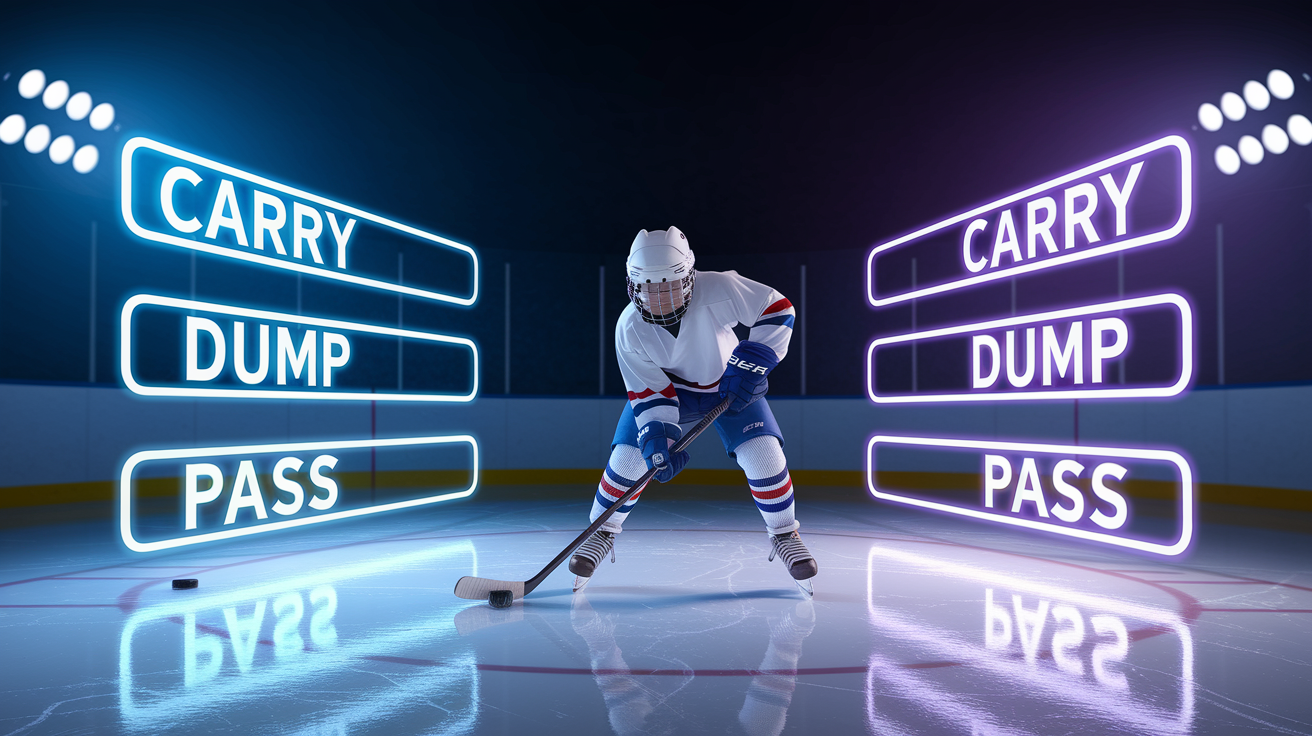
Youth hockey uses three basic entry types. Controlled carry means you skate it in with speed and protect the puck. Dump and chase is when pressure’s tight or your angle’s garbage, so you fire it deep to a corner and race after it. Pass entry is a quick give and go or feeding a teammate who’s already moving into the zone. The decision’s pretty simple: carry when you’ve got room and speed, dump when someone’s breathing down your neck, pass when a teammate can grab it within 2 to 3 seconds.
Age matters. At 8U and 10U, keep the reads simple and don’t pressure them too hard. At 12U and 14U, you can add support timing and gap reads. After solid training, aim for 60 to 75% success on possession entries at 10U through 14U. That’s doable.
Speed through the neutral zone matters. Build it before the line, not after. Support spacing needs to be 2 to 3 feet from the puck carrier so one defender can’t cover both players. Puck protection means shield it on your body side, especially if contact’s coming at the line. Decision timing should happen within 3 seconds or you’re stalling out. Scan for gaps with your head up before you cross. Communication can be short, like “middle,” “boards,” or “support” so everyone knows what’s happening.
Controlled Carry Entry Techniques for Youth Players
Controlled carry is what you’ll see most at youth levels because it teaches skating, puck control, and decisions all at once. The base is speed management. Build it through the neutral zone with crossovers and long strides, keep it at the blue line, and know when to slow down so support can catch up. Protect the puck on your outside hand, especially when a defender’s closing. Read the play a stride or two before the line. If the defender’s angling you to the boards or stepping up, go wide or pick a different entry.
Before carrying under pressure, players need edge control and a quick first step. Teach them to slow down to draw a defender, then explode past. Young players coast into the zone flat footed. That kills speed and lets defenders close the gap fast. Controlled carry works when you’re faster than the nearest defender and you’ve got open ice ahead.
Body positioning puts the puck on the outside with your body between the defender and the puck, knees bent for balance. Head up scanning means quick looks to find support, defenders, and the net before crossing. Outside hand puck protection keeps it on your forehand or backhand away from pressure. Stride length should be long and powerful in the neutral zone, shorter and quicker when weaving through traffic. Don’t enter flat footed. Two quick strides into the zone, not a glide.
Start with 1v0 work where players carry to the blue line with no pressure, just speed and body position. Move to 1v1 with a passive defender who forces a choice but doesn’t go full tilt. Run 8 to 12 reps per player. Controlled carries are easy to teach and measure. If the player crosses with possession and doesn’t get knocked off the puck, it worked.
Dump and Chase and Chip Entry Concepts for Young Players
Dump and chase gets a bad name, but at youth levels it’s smart when you’re slowed down, pressured hard, or pinned along the boards before the line. The play’s simple. Rim the puck 1 to 2 feet off the boards into the offensive corner, then sprint to get it before the defender. Timing’s everything. Chase within 3 seconds or the puck’s a free clear for the other team. Soft rims work better than hard dumps straight onto the boards because they create better angles and force defenders to turn.
For younger ages, skip the heavy contact retrievals. At 8U and 10U, teach the rim and chase path without live hitting. At 12U and 14U, add forechecking where wingers angle toward the puck and the center supports the wall battle. Recovery angle’s critical. Don’t skate straight at the puck. Angle to cut off the defender’s exit and protect the puck with your body once you get there.
Use dump and chase when a forechecker’s within a stick length and you can’t escape with speed. Rim to the corner 1 to 2 feet off the boards, not flat on the wall where it’s easy to clear. Sprint to the puck within 2 to 3 seconds. If you wait, the defender beats you there. The second forward should support high or trail the play, ready for a quick out pass or a cycle option.
Run dump and chase drills with groups of three. One player rims, one chases, one supports. Rotate roles every 10 to 15 reps per side. Keep drill blocks to 6 to 10 minutes. Teach the difference between a soft rim (puck hugs the boards at moderate speed) and a hard chip (puck moves fast but stays low). Use it when you’re trailing late in a game, facing an aggressive 1 to 2 forecheck, or when a bad angle carry would turn it over.
Teaching Pass Entry and Give and Go Offensive Zone Entries

Pass entry methods matter at 10U and up because they use support spacing and make defenders choose between covering the puck carrier or the passing lane. Most common version is the give and go. The puck carrier dishes a short pass to a teammate near the blue line and drives into the zone to get a return pass. Timing’s everything. The receiver should arrive in the zone 0.5 to 1.0 seconds after the puck crosses the line. Not before (offsides) and not late (defender closes the gap). Support spacing should be 2 to 3 meters, wide enough that one defender can’t cover both.
Common mistakes include clumped spacing where all three forwards bunch at the blue line, and late arriving support where the pass option isn’t there when the puck carrier needs it. Teach players to read lanes: inside lane (middle of the ice), weak side lane (opposite the puck), and trailer lane (center following the play). Each lane creates a different passing option and forces defenders to adjust.
Timing and Support for Pass Entries
Timing for pass entries breaks down into three phases: approach (puck carrier and support converge on the blue line), release (pass is made just before or at the line), and reception (support player collects in the zone and attacks). For give and go entries, the puck carrier should release the pass within 1 to 2 strides of the line and immediately drive to an open lane. Stretch pass entries have the puck carrier hold in the neutral zone while a winger or center times a skating route to arrive in the zone as the pass is released. Late trailer entries involve a delayed third forward who enters 1 to 2 seconds after the initial entry, creating a second wave of pressure.
| Entry Variation | Timing Target | Support Position |
|---|---|---|
| Give and go | Receiver arrives 0.5 to 1.0 seconds after puck crosses line | Inside lane, 2 to 3 meters from puck carrier |
| Stretch pass | Winger times arrival to match puck delivery (1 to 2 seconds) | Weak side lane, skating toward far post |
| Pass to space | Puck placed in open zone, support arrives within 1 second | Middle lane, driving to net or half wall |
| Late trailer | Third forward enters 1 to 2 seconds after initial entry | Trailer lane, center ice or weak side |
Decision Making Skills for Offensive Zone Entry Under Pressure
Young players need a simple framework to pick between carry, dump, or pass under pressure. Four variables: pressure (how close is the nearest defender), speed (am I faster than the defender), support (is a teammate in position to receive a pass), and ice geography (where am I on the ice, boards, middle, or weak side). The decision should happen within 3 seconds. If players stall at the blue line, defenders collapse and the entry fails.
Teach pressure recognition first. If a defender’s within a stick length and closing fast, the controlled carry is risky. Dump or pass instead. If the defender’s two strides away or backing up, the carry’s open. Speed differential is the second check. If you’re at full speed and the defender’s flat footed or turning, carry the puck. If you’re slowing down or out of position, look for a pass or dump option.
Support options are the third variable. Before crossing the line, scan for open teammates. If a winger’s skating into the weak side lane and the pass window’s clean, hit them. If no support’s available and pressure’s heavy, dump the puck and chase. Ice geography matters because middle ice entries create more passing lanes, while board side entries often force dump plays. Coaches can use scenario drills that freeze the play and ask, “Carry, dump, or pass?” Then run it live and review the choice.
Check the gap between you and the nearest defender before the blue line. If you’re faster and the lane’s open, carry. If you’re slowing or trapped, dump or pass. Quick scan for teammates in passing lanes. If no one’s open, protect the puck or rim it deep.
Age Specific Progressions for Teaching Offensive Zone Entries

At 8U, focus 70% of entry work on skating fundamentals and puck protection. Drills should be 30 seconds or less and involve simple 1v0 carries where players practice crossing the blue line with the puck on their forehand and backhand. Introduce the concept of “head up” and “protect the puck on your body side.” Don’t add defensive pressure or complex reads yet. The goal is to build confidence carrying the puck at speed and stopping or turning after crossing the line.
At 10U, introduce a 50/50 mix of controlled carry and basic dump and chase. Add one or two passing entry drills per practice, focusing on give and go timing with a stationary coach or passive partner. Start using light defensive pressure in 1v1 setups where the defender forces a decision but doesn’t finish checks. Drills should run 5 to 8 minutes each, with 10 to 15 reps per player. Teach players to recognize when they have speed advantage and when to rim the puck.
At 12U, shift to a 40% controlled carry, 30% pass entry, 30% dump and chase split. Emphasize support spacing at 2 to 3 feet (0.6 to 1 meter) and timing of the second forward’s arrival. Introduce 2v1 and 3v2 entry drills where players must choose the best option under pressure. Run drills for 8 to 12 minutes with 10 to 20 reps. Teach angling concepts, how to force a defender to commit before making the entry choice. Start tracking entry success rates in practice and small area games.
At 14U, expect multi option reads and decision making under higher forechecking pressure. Practice 2 on 1 and 3 on 2 overload entries twice per week, rotating through all three entry methods. Add cross ice stretch passes, delayed entries, and cycle plays off the boards. Drills should run 10 to 15 minutes with scenario based setups that mirror game situations. Introduce video review so players can see their decision points and adjust. Track entry completion percentage and turnovers per entry. The goal is consistent execution of all three methods with the ability to read defensive structure and adjust on the fly.
Progressive Drills and Practice Plans for Offensive Zone Entries
Start with technical skill drills that isolate one element of the entry. The 2v0 controlled entry drill has two attackers start at center ice, enter the zone with the puck, and finish with a shot. Run 8 to 12 reps over 5 to 8 minutes. Focus on speed across the blue line, head up scanning, and finishing the play. The dump and chase triangle drill uses groups of three: a coach dumps the puck to the corner, a winger chases and retrieves, and a defenseman supports up ice for a quick out pass. Run 10 to 15 reps per side over 6 to 10 minutes.
The 2v1 decision drill adds live defensive pressure. A defender starts deep in the zone, and two attackers must choose carry, dump, or pass within 4 seconds of crossing the blue line. Run 12 to 18 reps over 8 to 12 minutes. Rotate defenders so everyone practices both roles. The line entry rotation drill runs full forward lines through entry scenarios. One line carries, one line pass enters, one line dumps, and rotates every 90 seconds. Run 3 to 4 rotations, 5 to 7 minutes per rotation.
A 60 minute practice template looks like this: 10 minutes warm up (skating and puck handling), 20 minutes technical drills (run two of the drills above back to back), 20 minutes small area games (3v3 or 4v4 cross ice focusing on entry choices), and 10 minutes controlled scrimmage with a focus on entry execution and coach feedback. Track entry attempts and success rates during the scrimmage.
Building Repetition Without Fatigue
Good reps need focus, not exhaustion. Rotate drill stations every 8 to 10 minutes so players stay sharp. Keep a coach to player ratio of 1:6 to 1:10 for technical feedback. Use shorter drill bursts (20 to 30 seconds of live action, then reset) rather than long continuous sequences. This keeps decision quality high and cuts the risk of sloppy habits forming under fatigue.
Switch drills every 8 to 10 minutes to maintain attention and energy. Run live sequences for 20 to 30 seconds, then reset and give immediate feedback. Define what a successful rep looks like before the drill starts (for example, “cross the line with possession and head up”). Stop the drill and correct technique or decision making on the spot, then re run the rep. Start drills at 50 to 70% speed, then increase to full game speed as players show consistency.
Common Youth Zone Entry Mistakes and Corrective Coaching Cues

One of the most common mistakes is trying to carry the puck through heavy pressure when a dump or pass is the better choice. Players see open ice two strides away and commit to the carry, but a forechecker closes the gap and forces a turnover at the line. The correction is teaching immediate recognition. If a defender’s within a stick length and closing, protect the puck with your body, angle to the boards, and either dump or make a quick pass. Practice this with 1v1 pressure drills where the defender applies varying levels of pressure and the puck carrier must choose the best exit.
Dumping the puck with no chase is another frequent issue. Players rim the puck into the corner and then coast or stop skating, letting the opposing defenseman collect it cleanly. The correction is the “3 second rule.” Chase the puck within 3 seconds or don’t dump it. Run dump and chase drills with a timer or whistle to reinforce immediate pursuit. Pre position wingers so they know their chase responsibility before the puck is rimmed.
Clumping at the blue line happens when all three forwards converge on the same spot, making it easy for one or two defenders to cover everyone. The correction is staggered timing and lane discipline. Teach players to spread across three lanes (boards, middle, weak side) and enter in waves, not as a pack. Use visual markers on the ice, cones or lines, to show proper spacing (2 to 3 meters apart). Run 3v2 drills where spacing violations result in a stop and reset.
Flat footed entries kill momentum and make it easy for defenders to step up and close the gap. Players glide into the zone instead of driving with quick strides. The correction is cueing two hard strides across the blue line: “Get your feet moving before you cross, not after.” Practice first step quickness drills where players accelerate from a standstill to full speed in three strides.
Dumping directly onto the boards is the final common mistake. When the puck hits the boards flat, it bounces unpredictably or stays on the wall where defenders can easily clear it. The correction is teaching the rim 1 to 2 feet off the boards into the corner. This creates a better retrieval angle and forces the defender to turn and skate back. Use target zones marked with cones or tape in the corners during dump drills, and track successful placements.
Carrying into pressure gets corrected by teaching immediate dump or chip escape when a defender’s within a stick length and closing. Dumping with no chase gets fixed by enforcing the 3 second rule and pre positioning wingers for pursuit responsibility. Clumping at the blue line gets corrected with staggered timing, lane discipline, and 2 to 3 meter spacing cues with visual markers. Flat footed entries get fixed by cueing two hard strides across the line and practicing first step quickness drills. Dumping onto the boards gets corrected by teaching rim placement 1 to 2 feet off the boards into the corner and using target zones in drills.
Measurement, Video Analysis, and Tracking Entry Improvement

Tracking entry success rates gives coaches and players a clear measure of progress. At 12U, target a controlled entry success rate of at least 60% after 6 to 8 weeks of consistent training. At 14U, aim for 70% or higher. Success means the puck crosses the blue line with possession and the team maintains control for at least one possession cycle. Track turnovers per entry as well. Set a goal of fewer than 0.3 turnovers per entry attempt. A simple ledger works: note each entry attempt, mark it as successful or turnover, and calculate the percentage weekly.
Video analysis speeds up learning. Record practice scrimmages or game shifts and review 30 to 90 second clips with players. Focus on decision points: where was the pressure, what were the support options, and did the player make the right choice. Use slow motion playback on 2 to 3 key frames to show body positioning, puck placement, and timing. Schedule short team review sessions (10 to 15 minutes) once per week to highlight successful entries and common mistakes.
Time to zone is another useful metric. Measure how long it takes from the moment the puck crosses center ice to the moment it crosses the blue line with possession. For 12U and above, aim to reduce decision time to 3 seconds or less under pressure. Faster decisions reduce the chance that defenders can collapse on the play. Track this during controlled scrimmages and compare week over week progress.
| KPI | Target (12U) | Target (14U) |
|---|---|---|
| Controlled entry success rate | ≥60% | ≥70% |
| Turnovers per entry | <0.3 | <0.3 |
| Decision time under pressure | ≤3 seconds | ≤3 seconds |
Final Words
You’re crossing the blue line, so decide fast – carry, dump-and-chase, or pass. Carry when you have space and speed. Dump when you’re pressured. Pass when a teammate will be there in 2-3 seconds. Make reads within 3 seconds.
Teach by age. 8U keep it simple. 10U mix carries and dumps and introduce passes. 12U-14U develop multi-option reads. Use rep-based drills and short bursts, and aim for about 60-75% possession entries after training.
Practice the checklist of speed, support spacing, puck protection, decision timing, scanning, and simple communication, and track entry rates with video. These offensive zone entry strategies for youth hockey pay off – more controlled starts, fewer turnovers, and better scoring chances.
FAQ
Q: What are the primary offensive zone entry methods for youth hockey?
A: The primary offensive zone entry methods for youth hockey are the controlled carry, dump-and-chase, and pass-entry, each used based on space, pressure, and teammate support to protect possession at the blue line.
Q: When should players choose a controlled carry, dump, or pass on entry?
A: Players should choose a controlled carry when they have open ice and speed, dump when under heavy pressure or a bad angle, and pass when a teammate will support within two to three seconds.
Q: What age-specific entry guidelines should coaches follow?
A: Age-specific entry guidelines say 8U focus on skating and puck protection, 10U split carry/dump with basic passes, 12U balance carry/pass/dump, and 14U practice multi-option reads with 2-on-1 and 3-on-2 scenarios.
Q: How should coaches teach controlled carry technique?
A: Coaches teach controlled carry with edge control, first-step speed, crossovers for momentum, reading defender angles, and 1v0/1v1 progressions, using about 8–12 reps per drill to build confidence.
Q: How should dump-and-chase be taught to young players?
A: Dump-and-chase should be taught for heavy pressure by placing the puck 1–2 feet off the boards, retrieving within three seconds, running 10–15 reps per side, and limiting high-contact retrievals for 8U–10U.
Q: How to teach pass-entry and give-and-go timing?
A: Pass-entry and give-and-go timing require the receiver to arrive 0.5–1.0 seconds after the puck crosses the blue line, maintain 2–3 meters support spacing, and use 10-minute drills with about ten reps per side.
Q: What decision-making framework helps players choose under pressure?
A: The decision-making framework uses four variables—pressure, speed, support, and ice geography—with players trained to decide within three seconds through scenario-based and increasing-pressure drills.
Q: What drills and practice plan best improve zone entries?
A: A practical plan uses 2v0 controlled entries (8–12 reps), dump-and-chase triangle (10–15 reps), and 2v1 decision drills (12–18 reps) inside a 60-minute practice: 10 warm-up, 20 technical, 20 small-area, 10 scrimmage.
Q: What are common zone entry mistakes and quick corrections?
A: Common mistakes are carrying into pressure, dumping with no chase, clumping at the blue line, flat-footed entries, and dumping onto the boards; correct with staggered timing, 1–2 foot rim targets, 2–3 meter spacing, and tempo cues.
Q: How should coaches measure and track entry improvement?
A: Coaches should measure entry success rates (≥60% for 12U, ≥70% for 14U within 6–8 weeks), turnover rate (<0.3 per entry), and use 30–90 second video clips with slow-motion key frames for review.
Q: How many repetitions per drill are recommended for retention?
A: Recommended repetitions are 8–12 reps for controlled carry drills, 10–15 for dump-and-chase per side, and 12–18 for 2v1 decision drills, keeping bursts short to maintain decision quality.