
Think your highlight reel will sell you? Most get skipped in the first 15 seconds.
Scouts decide fast, about 30 seconds to judge if you belong on their list.
They want skating, hockey IQ, compete level, and a clear jersey number they can read.
This post walks you through picking the 4s and 5s, sequencing an attention-grabbing opener and closer, adding a clean ID card, and exporting a crisp 1080p MP4.
Do this and your reel won’t just be seen, it’ll get a follow-up.
How to Make a Hockey Highlight Video (Quick Start Guide)
A hockey highlight reel is a 2–4 minute video that shows your best on-ice plays. That’s it. Coaches and scouts use it to figure out if you can play at their level, and they’re making that call in about thirty seconds. So your job is simple: give them what they need to see, fast, then back it up with consistent proof across the rest of the video.
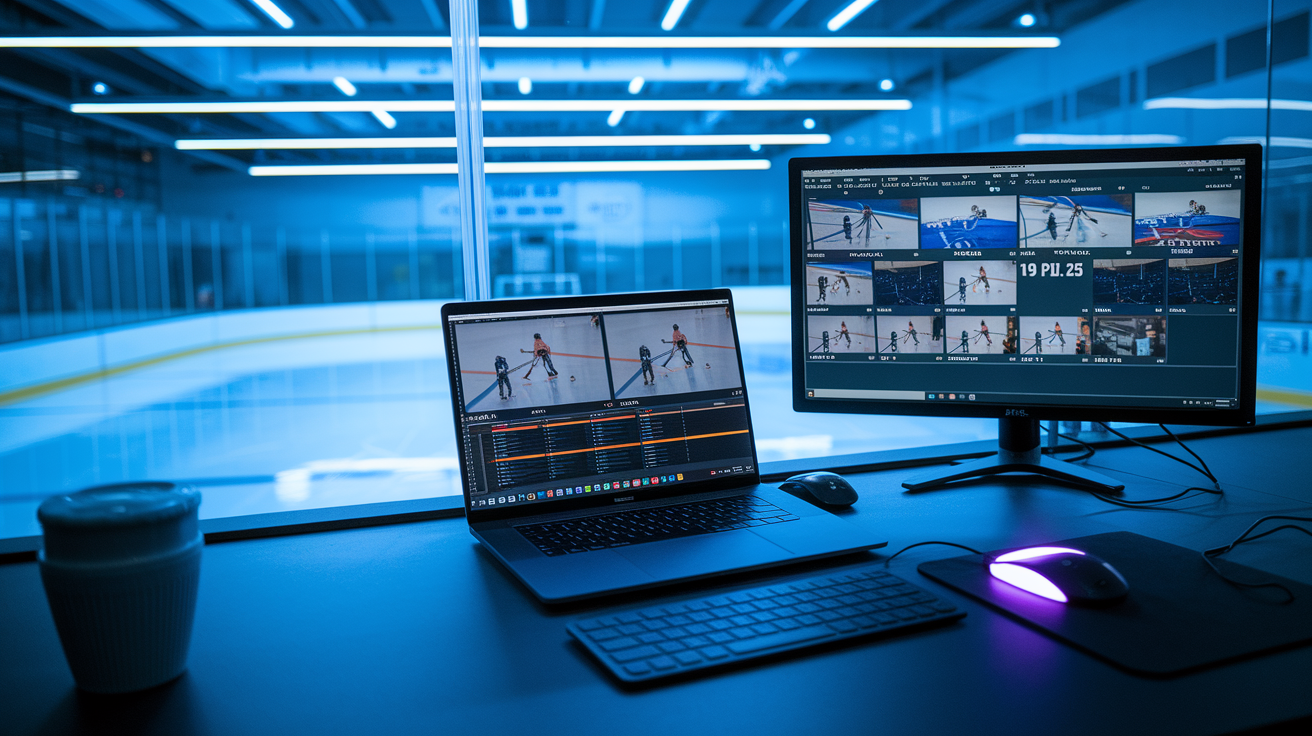
The process moves quicker than most families think. You’re going to grab game footage, watch it back to find your top 15–25 plays, edit those clips into a tight sequence, slap your name and jersey number on screen, then export and upload to a platform scouts actually check.
Here’s how it breaks down:
- Grab footage from 3–6 recent games where you played well and the camera caught the full play.
- Tag your clips by jotting down the game, start and stop times, a quick description, and a 1–5 rating.
- Pick only the 4s and 5s. Your absolute best moments go in the timeline. Nothing else.
- Arrange strongest to strong. Lead with a top-tier play in the first ten seconds. Save one memorable closer for the end.
- Add a title card with your name, position, grad year, jersey number, team, and contact info. Export as 1080p MP4, upload to YouTube or a recruiting platform.
Total editing time for a first reel usually runs 3–5 hours if you’ve already logged clips. Skip the logging step and you’re looking at double that.
Selecting the Right Clips for Maximum Impact

Coaches and scouts spend less than two minutes on most highlight reels. They’re hunting for proof you can play at their level, not a full season recap. Every clip needs to show a skill, a decision, or a physical tool that matters in competitive hockey.
Watch your game footage and ask one question for every play: “Does this prove I can do something a coach needs?” If the answer’s “maybe” or “sort of,” skip it. Coaches want hockey IQ. Reads in transition, gaps on defense, quick decisions under pressure. They want skating. First three steps, top speed, edges in tight. Puck skills. Hands in traffic, tape-to-tape passes, shot release. And they want to see you compete. Winning wall battles, finishing checks, blocking shots, recovering after a turnover.
The best clips run 4–8 seconds and show a complete play from setup to finish. A good goal clip starts with you getting the pass or winning the puck, shows the shot, ends with the celly or next faceoff. A good defensive clip shows you closing a gap, making a stick check, starting the breakout. Longer clips risk losing attention. Shorter ones usually lack context.
Focus on these six things when you’re choosing footage:
- Clear view of your jersey number so the scout knows which player to watch.
- Strong skating in at least 30% of clips. Speed, edges, transitions, footwork under pressure.
- Hockey sense and positioning. Reads that lead to takeaways, open ice for a pass, coverage that kills a shot.
- Puck control or passing vision. Making a play in tight space or finding a teammate most players miss.
- Special teams. Power play, penalty kill, faceoff wins if those are strengths.
- Compete level. Finishing a check, battling for a loose puck, blocking a shot, recovering from a mistake to break up a scoring chance.
If a clip shows two or three of those at once, it belongs near the front.
Technical Video Specs and Recording Quality

Scouts and coaches will close a video in fifteen seconds if the footage is blurry, shaky, or shot from an angle that makes the play impossible to follow. Quality doesn’t need to be broadcast level, but it does need to be clear enough to evaluate skating stride, stick position, and decision speed.
The ideal setup? Tripod-mounted camera at center ice, elevated slightly above glass level, shooting at 1080p and 60 frames per second. That frame rate captures fast movement without motion blur. 1080p gives enough detail for a scout watching on a laptop or phone. If you’re recording in 4K, fine, but most coaches won’t notice the difference and the file size becomes a pain to share.
Camera angle matters more than resolution. A wide shot showing the full width of the ice lets a coach see spacing, positioning, how plays develop. Zoomed-in or handheld footage that jerks around loses context and makes it tough to judge reads or skating. If you’re filming youth or high school games yourself, mount the camera on a monopod or tripod behind the glass at center red line. For goalies, add a second angle from behind the net if you can. Scouts want to see positioning, rebound control, recovery.
| Setting | Recommendation |
|---|---|
| Resolution | 1920×1080 (1080p) minimum; 4K optional but export to 1080p |
| Frame Rate | 60 fps preferred for hockey; 30 fps acceptable if stable |
| Camera Position | Center ice, elevated, tripod-mounted; wide angle covering blue line to blue line |
| Lighting | Consistent rink lighting; avoid dark arenas or heavy glare from glass |
| Audio | Natural game sound; avoid loud music that drowns puck contact and skate noise |
Consistency across clips builds trust. If half your reel is sharp 60fps center-ice footage and the other half is grainy phone video from the stands, the coach will wonder why you didn’t have better footage. Stick to one or two high-quality games instead of mixing in lower-quality clips just to hit a certain video length.
Editing Workflow and Sequencing

Editing a hockey highlight reel is less about creative flair, more about clarity and speed. Coaches don’t want flashy transitions or slow-motion replays of every play. They want your best clips in quick succession, with just enough context to understand what happened and why it mattered.
Organizing Your Footage
Before you open an editor, log your clips. Use a simple doc or spreadsheet. Write down the game name, the period and rough timestamp, a two or three word description of the play, and a rating from 1 to 5. A goal off a clean breakout pass where you skated past two defenders? That’s a 5. A routine wall battle where you came out with the puck? That’s a 3. A clip where you’re visible but didn’t directly impact the play? That’s a 1 or 2, and it shouldn’t make the final cut.
Once you’ve logged 20–40 plays, sort by rating. Pull every 5-star clip into one folder or bin, every 4-star clip into another. Ignore everything rated 3 or below. You’re shooting for 15–25 total clips in the finished video, and all of them should be plays you’re confident showing a Division I coach or a junior scout. If that means your reel is only two minutes long, that’s better than padding it to four minutes with mediocre footage.
Group your clips by category. Goals and offensive zone plays, neutral zone skating and transition, defensive zone coverage and breakouts, special teams. That organization makes sequencing faster and helps you spot gaps. If you’ve got twelve offensive clips and only two defensive ones, either find better defensive footage or accept that offense is your selling point and lean into it.
Sequencing for Maximum Impact
Lead with your single best play. Not your second-best. Not a “pretty good” setup clip. Your absolute top moment from the entire season. A coach who clicks your video will decide in the first ten seconds whether to keep watching. If those ten seconds show a highlight-reel goal, a perfectly timed hit that starts a breakout, or a diving shot block that saves a goal, you’ve bought yourself another two minutes of attention.
After the opener, build in descending strength but don’t dump all your best plays in the first thirty seconds. Spread your 5-star clips across the first half of the video, mixing in strong 4-star plays to keep pace. Don’t repeat the same skill or situation. If you open with a breakaway goal, don’t follow it with three more breakaways. Show variety. A goal, then a great pass, then a defensive read, then speed through neutral ice.
Save one standout clip for the final ten seconds before your contact card. Coaches remember the last thing they see, and a strong closer reinforces the impression that you’re worth a follow-up email or call. Between the opener and closer, keep clips short and cuts clean. A 4-second clip, a quick fade or cut, then the next 5-second clip. No long transitions, no effects, no slow-motion unless it’s truly necessary to show a technical detail like hand position on a one-timer.
Final Export Settings
When the timeline’s locked, export as MP4 using the H.264 codec. Set resolution to 1920×1080, frame rate to match your source footage (ideally 60fps), and use a variable bitrate around 10–15 Mbps. That combo keeps file size under 200–300 MB for a 3–4 minute video, which uploads quickly and plays smoothly on any device.
Set audio to AAC at 128 kbps and keep the overall loudness around -14 LUFS so the video doesn’t blast when someone clicks play. If you added background music, duck it under game audio during key moments. Puck contact, a big hit, a goal horn. Scouts want to hear the game, not a soundtrack. Export, watch the full file on your phone to check for glitches or sync issues, then upload.
Labels, Graphics, and Identifying Information
A highlight reel without clear player identification is useless. Scouts watch dozens of videos a week, often back-to-back, and if they can’t immediately tell which player to focus on, they’ll move to the next reel in their inbox.
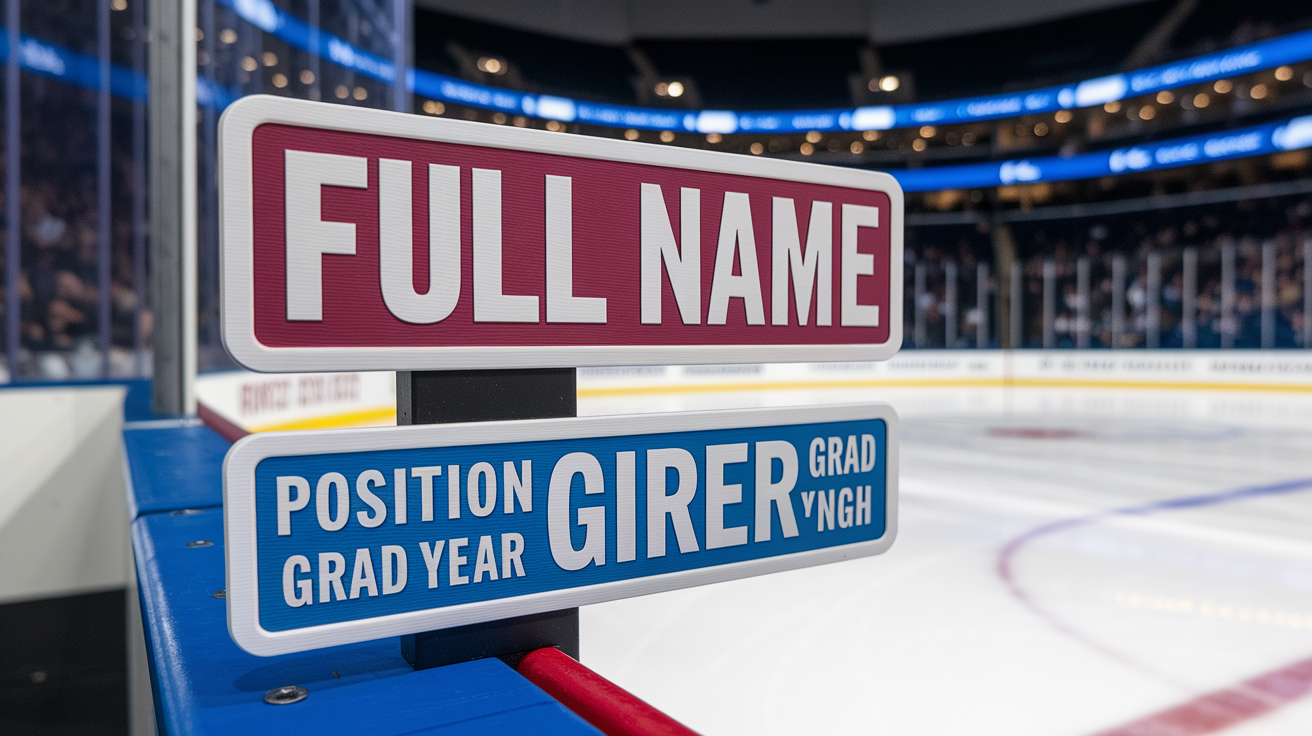
At minimum, add a title card in the first three seconds with your full name, position, graduation year, jersey number, height, weight, and dominant shot. Keep it on screen for 4–6 seconds. Use a clean sans-serif font in a color that contrasts with the rink background. White text with a black outline works on almost any footage. Place it in the lower third so it doesn’t block the action when clips start.
During game clips, use a small on-screen label in the corner. Your last name and jersey number, so a coach can glance at the screen and instantly find you. Some editors add a subtle circle or arrow tracking the player for a second or two at the start of each clip, especially in wide-angle footage where jerseys are harder to read. That’s optional, but it helps. End the video with another contact card showing your name, email, phone number, team, and the date range of the footage. If you have a recruiting profile link or Hudl page, include that too.
Required on-screen elements:
- Full name and jersey number on opening title card
- Position, grad year, height/weight, and dominant hand/shot
- Contact email and phone number on closing card
- Team name and league level (e.g., “AAA U16,” “NAHL,” “High School Varsity”)
- Short text overlay identifying the opponent or context for standout plays (optional but helpful for unfamiliar teams)
Coaches need to know who you are, how to reach you, and when the footage was shot. If those three things are clear, you’ve handled the basics that eliminate most reels from consideration.
Common Mistakes to Avoid in Hockey Highlight Reels

Most highlight reels fail for predictable reasons. The video’s too long, the footage is too dark, the player’s hard to identify, or the clip selection includes plays that don’t prove anything. Fixing these mistakes doesn’t require advanced editing skills. It requires discipline during the review and selection process.
The single biggest error is length. Coaches will not watch a seven-minute highlight reel from a high school sophomore. They barely watch four-minute reels from draft-eligible players. If your video runs longer than five minutes, you’ve included filler. Go back, cut the weakest third of your clips, and tighten the edit. A two-minute reel of excellent plays will get more replies than a six-minute reel padded with average shifts.
Common mistakes that cost players opportunities:
- Overuse of slow motion that turns a 5-second play into a 15-second drag and kills pacing.
- Loud music that drowns out game audio, making it impossible to hear puck contact, skate edges, or on-ice communication.
- Shaky or zoomed-in footage where the coach can’t see positioning, spacing, or how the play developed.
- Including penalties, turnovers, or defensive lapses unless you’re specifically showing recovery or learning. Coaches assume you’re highlighting mistakes by accident.
- Repetitive clips showing the same skill or situation five times in a row instead of demonstrating range.
- No contact information or wrong grad year in the title, description, or on-screen text, forcing the coach to guess or move on.
- Uploading a file so large it won’t load on mobile or attaching a 500 MB video to an email instead of using a link.
Before you send the reel to anyone, watch it on your phone with the sound on. If you lose interest halfway through, a coach will too. If you can’t clearly see your jersey number in every clip, neither can they. If the music’s louder than the game, turn it down or remove it. Fix those problems before the video leaves your inbox.
How to Distribute Your Hockey Highlight Reel

A great highlight reel doesn’t help if no one sees it. Most coaches prefer a YouTube link sent via email, with key stats and contact info in both the subject line and the body of the message. Unlisted videos work best. Public enough that a link opens instantly, private enough that you control who has access.
Upload your final MP4 to YouTube, set the privacy to “Unlisted,” and add a clear title: “John Smith – Forward – 2026 – 3:15 Highlight Reel – [Team Name].” In the description, paste your full contact info, height, weight, position, dominant hand, current team, league level, and season stats. Games, goals, assists, points, plus-minus. Add timestamps if your reel has distinct sections. 0:00 Intro, 0:12 Goals, 1:30 Defensive Plays, 2:45 Contact Info. That structure lets a coach jump to the skills they care about most.
When you email the link, keep the message short. Coaches are busy. They don’t need three paragraphs about your hockey journey. They need your name, grad year, position, one standout stat, and the video link in the first two sentences. Subject line example: “Smith, Forward, 2026 – 22G/18A – Highlight Reel (3:15).” Body example: “Coach, I’m a 2026 forward with [Team Name] in [League]. This season I posted 22 goals and 18 assists in 35 games. Here’s my highlight reel: [YouTube link]. I’m 5’11”, 170 lbs, left shot. Best number is [phone]. Thanks for your time.”
Five-step distribution checklist:
- Upload to YouTube as Unlisted and confirm the video plays smoothly on both desktop and mobile before sending.
- Write a short, stats-focused email with your name, grad year, position, and one key number in the subject line.
- Paste the YouTube link in the body along with contact info and a one-sentence summary of your current team and league.
- Send to 10–20 targeted coaches whose programs match your skill level and academic goals. Personalize each email with the coach’s name and school.
- Post the same video to your recruiting profile (Hudl, InStat, or another platform scouts use) and update it every 8–12 weeks as you collect better footage.
Don’t attach the video file to the email. Attachments over 10 MB often get blocked by spam filters, and coaches won’t download a random file from a player they don’t know. A link is faster, safer, and easier to share with assistant coaches or scouts. If a coach requests the raw file later, send it via a cloud link. Google Drive, Dropbox, or WeTransfer. Not as an attachment.
Final Words
Lead with your best plays: pick 4–8 second clips that show hockey IQ, skating, puck control, and positioning. Keep angles steady, shoot 1080p or 4K at 30–60 fps, and edit fast so the video stays under four minutes.
Label the reel with name, number, position, season, and brief on-screen markers. Avoid excessive slow motion, irrelevant clips, or loud music. Export MP4 and share via an unlisted YouTube link with key stats.
Follow this checklist and you’ll know how to create a hockey highlight reel that gets noticed. Coaches will see the player you want them to see.
FAQ
Q: How to get noticed in hockey?
A: Getting noticed in hockey means showing consistent impact: strong skating, smart puck decisions, high hockey IQ, special‑teams value, clear game video, solid stats, and sending coaches a short, labeled highlight reel.
Q: How to make a professional highlight reel? / What makes a good highlight reel?
A: Making a professional highlight reel and what makes a good highlight reel: select 2–4 minutes of your best plays, lead with top clips, keep clips 4–8 seconds, use clean edits, and show your jersey number.
Q: What is the best app for making sports highlight reels?
A: The best app for making sports highlight reels depends on needs: iMovie for quick iPhone/Mac edits, Adobe Premiere Rush for cross‑device simplicity, and DaVinci Resolve for powerful, free desktop editing.