
Think a $25 boil-and-bite is enough when a puck hits your face at 80 mph?
Here’s the catch.
Players who skip mouthguards are 60 times more likely to need major dental work, and a single implant can cost thousands.
So the choice isn’t just comfort.
It’s protection, breathing, fit, and long-term value.
In this post we’ll explain how custom guards use exact impressions and lab materials to give better shock distribution and retention, while boil-and-bite models deliver affordable, short-term protection for youth and rec players.
By the end you’ll know which type fits your level and risk.
Direct Comparison of Custom vs Boil-and-Bite Mouthguards for Hockey Performance

Players not wearing mouthguards are 60 times more likely to suffer dental injuries. A single dental implant costs $3,000 to $6,000. So the choice between custom and boil-and-bite protection isn’t just about comfort. It’s about what happens when a puck comes off a stick blade at 80 miles per hour or when you take an elbow during a board battle.
Custom mouthguards cost $100 to $500 and last 2 to 3 seasons. Boil-and-bite models run $15 to $50 and need replacement every season. Custom guards use dental impressions to create an exact match to your bite. Superior shock absorption, retention, breathing performance. Boil-and-bite guards soften in hot water and shape to your teeth when you bite down. When fitted correctly, they protect adequately in many situations.
The gap shows up under high-impact forces. Puck strikes, stick contact, body checks. That’s where custom models distribute energy more effectively and stay in place without constant adjustment.
Here’s how the two types compare on factors that matter in real games:
Protection level: Custom guards use optimized thickness distribution and lab-grade materials to absorb and disperse impact forces. Boil-and-bite models offer solid protection but less precise shock management.
Fit quality: Custom guards lock into place using exact dental impressions. Boil-and-bite fit depends on careful molding and can loosen over time.
Comfort: Custom designs minimize bulk and create strategic airflow channels. Boil-and-bite guards tend to be bulkier and can feel intrusive.
Breathing and communication: Custom models allow clearer speech and easier breathing. Boil-and-bite designs often interfere with both.
Lifespan: Custom guards hold up for multiple seasons. Boil-and-bite guards wear faster and may need seasonal replacement.
Cost: Custom requires higher upfront investment. Boil-and-bite offers immediate low-cost access.
| Attribute | Custom | Boil-and-Bite |
|---|---|---|
| Protection | Superior force distribution; best for high-impact zones | Adequate when fitted properly; limited by material precision |
| Fit & Retention | Exact match from impressions; stays put without biting | Variable; can loosen or shift during play |
| Comfort | Minimal bulk; many users forget they’re wearing it | Bulkier; can cause discomfort over long shifts |
| Breathing | Designed channels; easier airflow | Depends on model; often restricts breathing |
| Communication | Clear speech; less interference | Muffled; harder to call plays or talk on bench |
| Lifespan | 2–3 seasons with proper care | Often 1 season or less; faster wear |
| Cost | $100–$500 | $15–$50 |
For players in checking leagues or with prior dental work, custom guards deliver real advantages. For youth players who’ll outgrow guards quickly or recreational skaters in non-contact games, a properly fitted boil-and-bite can handle the job without the higher upfront cost.
Breakdown of Hockey Mouthguard Types and Materials
Stock mouthguards are pre-formed and ready to wear. They cost $5 to $15, but they rarely fit well and often fail league standards. Most players skip them entirely because they’re uncomfortable, hard to breathe through, and don’t stay in place. They’re not a real option for hockey.
Boil-and-bite mouthguards use thermoplastic that softens in hot water. You bite into the warm material to shape it around your teeth. The fit is better than stock guards but still depends on how carefully you mold it. Most hockey players use boil-and-bite models because they’re affordable, available at sporting goods stores, and can be fitted at home in 10 to 15 minutes.
Custom mouthguards are fabricated in a lab from dental impressions or digital scans. The materials are higher quality, and the thickness is optimized for each zone of your mouth. Premium custom designs use dual-laminate structures for better shock absorption and built-in airflow channels so you can breathe and talk without constantly pulling the guard out. The fit is exact, so it doesn’t move during play.
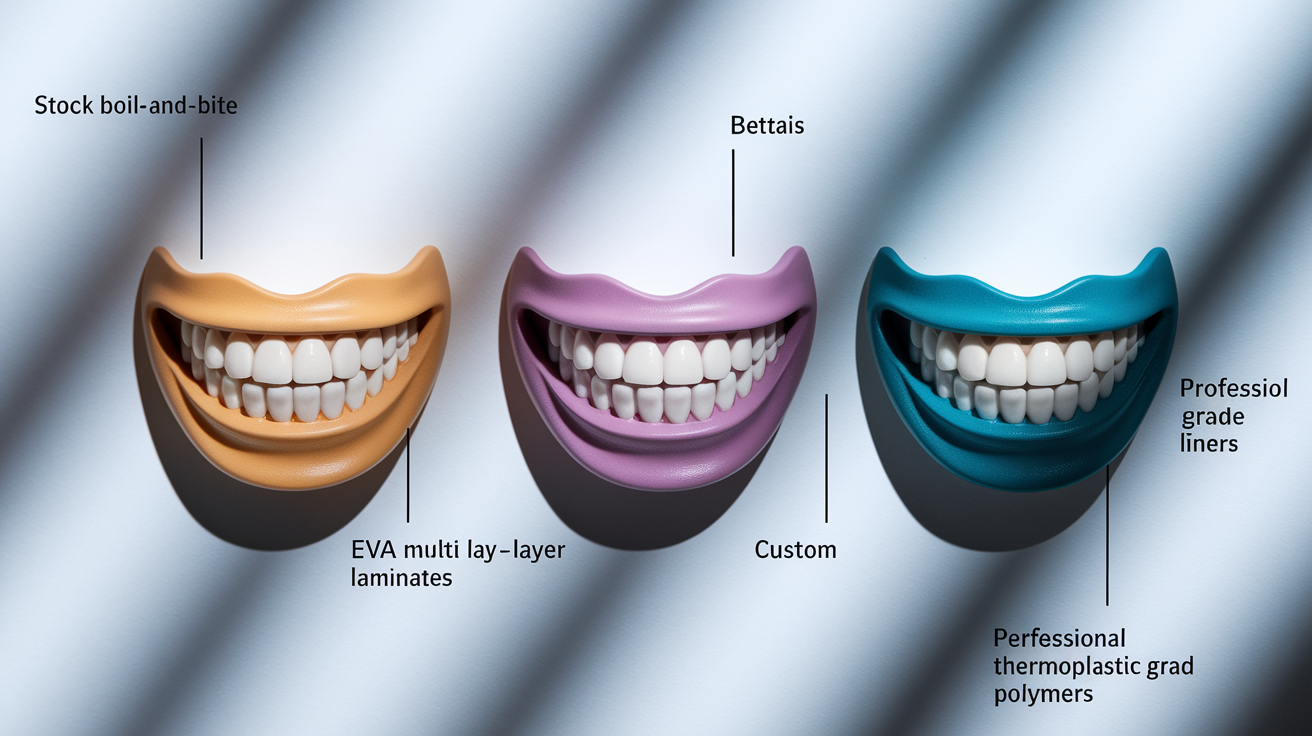
Common materials and their performance traits in hockey mouthguards:
EVA (ethylene-vinyl acetate): Most boil-and-bite guards use EVA because it softens predictably and reshapes well. Decent shock absorption but wears down faster than lab materials.
Multi-layer laminates: Custom guards often layer different densities to absorb impact in high-risk zones while staying thin in areas that affect breathing and speech.
Perforated thermoplastic: Models like SISU use thin, perforated designs to improve airflow. Less bulk but can be less protective in extreme impacts.
Gel liners: Some boil-and-bite guards add a gel layer for cushioning and better molding. Improves comfort but doesn’t match custom precision.
Professional-grade polymers: High-end custom models use lab-formulated materials that resist compression and maintain shape longer than consumer thermoplastics.
Custom Mouthguards for Hockey: Fit, Retention, and Impact Performance

Custom mouthguards start with an exact replica of your teeth and bite. A dentist or mail-in kit captures your dental impressions or a digital scan, and a lab builds the guard to match. The result is a fit so secure that the guard stays in place without you clamping down on it. Less jaw fatigue, better breathing, no need to adjust between shifts.
Players who grind their teeth or have TMJ issues often see reduced strain because the guard aligns with their natural bite instead of forcing an awkward position.
Retention matters in hockey because a loose guard is a useless guard. If you’re constantly repositioning it or pulling it out to breathe, you’re more likely to leave it on the bench when the puck drops. Custom guards lock in and let you focus on the play. The precision fit also improves communication. You can call for a pass, yell a screen warning, or talk strategy on the bench without sounding like you have a mouthful of rubber.
Custom guards handle hockey-specific impact forces better in these ways:
Puck strikes: Lab materials and optimized thickness absorb high-velocity impacts without transferring as much shock to teeth and jaw.
Stick contact: Whether it’s an accidental high stick or a slash that rides up, the guard distributes force across a wider surface area.
Body checks: Sudden jaw compression from a hit is less likely to cause dental fractures or TMJ injury when the guard matches your bite exactly.
Concussion risk reduction: Properly fitted guards may help stabilize the jaw during impact, potentially lowering concussion risk. Research is still evolving, but the mechanism makes sense.
Premium models include options like the Gladiator Custom Pro ($200 to $250), which uses precision mail-in impressions and minimal bulk, and the Impact Custom Professional ($250 to $500), designed for players with dental trauma history or maximum protection needs. These aren’t just thicker versions of boil-and-bite guards. They’re engineered for the forces you face on the ice.
Boil-and-Bite Mouthguards for Hockey: Practicality, Value, and Fit Quality

Boil-and-bite mouthguards are the most common choice in hockey because they’re cheap, fast, and easy to replace. You heat them in boiling water for 60 to 90 seconds, let them cool just enough not to burn your mouth, then bite down and press the material around your teeth. The whole process takes 10 to 15 minutes, and you’re ready to skate. Models like the SISU Max 2.4 can be remolded multiple times if you don’t get it right the first try, which helps when you’re fitting at home without professional guidance.
The trade-off is fit quality. Even a carefully molded boil-and-bite guard is bulkier and less precise than a custom model. The material doesn’t conform as tightly to your teeth, so there’s more movement during play. Over time, the guard can loosen, especially if you’re in a checking league or take a lot of contact. More adjusting, more discomfort, and a higher chance you’ll pull it out when you need it most.
For youth players who outgrow guards every season anyway, the lower cost and shorter lifespan make sense. For adults playing competitive hockey, the limitations add up.
Common issues with boil-and-bite guards in hockey:
Bulky fit: The one-size approach and thicker material can make breathing harder and speech unclear.
Loosening over time: Repeated impacts and wear cause the guard to lose its shape and slip during play.
Inconsistent molding: If you rush the process or don’t press evenly, you end up with a poor fit that doesn’t protect well.
Limited shock absorption: The materials and thickness distribution aren’t optimized for high-velocity puck strikes or sudden jaw compression.
Frequent replacement: Most boil-and-bite guards need to be replaced every season, sometimes sooner if you play year-round or grind your teeth.
Boil-and-bite guards work best for youth players in non-checking leagues, recreational skaters, and anyone who needs a backup or immediate replacement. If you’re on a tight budget or playing casually, a quality boil-and-bite model like the Shock Doctor Gel Max ($25 to $35) or Battle Oxygen ($20 to $30) will give you solid protection without the upfront cost of a custom guard.
Hockey-Specific Protection and Impact Considerations
Hockey delivers impact forces that most other sports don’t. Frozen rubber traveling at speed, composite sticks swinging through tight spaces, and body-on-body collisions that compress your jaw in milliseconds. Custom mouthguards distribute those forces more effectively because the material thickness and density are tailored to your bite. When a puck hits your mouth, the energy disperses across the entire guard instead of concentrating on the point of impact.
Boil-and-bite guards absorb shock, but the fit and material limits mean more force transfers directly to your teeth and jaw.
Properly fitted mouthguards may help reduce concussion risk by stabilizing the jaw and limiting sudden movement during impact. The mechanism isn’t fully proven, but the theory is that a guard that doesn’t shift keeps your jaw from slamming into your skull as violently. Custom guards stay locked in place, so they’re more likely to provide that stabilization. Boil-and-bite guards that slip or require constant biting to hold position can’t deliver the same effect.
Another factor: players often pull out loose or uncomfortable guards between shifts. If the guard isn’t in your mouth when you take a hit, it doesn’t matter how good the protection is.
Custom protection shows clear advantages in these hockey scenarios:
High-velocity puck impacts: Custom materials and thickness distribution handle the sudden, concentrated force better than consumer thermoplastics.
Stick-to-face contact: The precision fit reduces the chance of the guard shifting on impact, which can cause secondary injuries when the guard itself moves into soft tissue.
Body checking and board collisions: Jaw compression from checks is less likely to fracture teeth or strain TMJ when the guard matches your natural bite.
Extended ice time: Competitive players logging heavy minutes need guards that breathe well and stay comfortable. Custom designs reduce fatigue and the temptation to remove the guard.
Step-by-Step Fitting: Custom vs Boil-and-Bite

A mouthguard that doesn’t fit correctly won’t protect you. Poor fit means the guard shifts during impact, doesn’t absorb force where it should, and increases the chance you’ll take it out when you need it most. Fitting a custom guard right requires following the impression process exactly. Fitting a boil-and-bite guard right takes patience and attention to timing.
Custom Fitting Steps
-
Order an impression kit or visit a dentist: Mail-in kits include trays and molding putty. Dentist visits use professional-grade materials or digital scans.
-
Prepare the impression material: Mix putty components (if using a kit) or let the dentist handle setup. Follow timing instructions exactly. Putty firms up fast.
-
Seat the tray and bite firmly: Press the tray into your mouth, bite down evenly, and hold still for the recommended time (usually 2 to 3 minutes). Don’t talk or shift your jaw.
-
Remove and inspect: Check that the impression captured all teeth cleanly with no air bubbles or gaps. If it’s incomplete, redo it. Bad impressions mean bad guards.
-
Ship and verify fit on arrival: Send impressions to the lab (or let the dentist handle it). When the guard arrives, test the fit immediately and contact the manufacturer if anything feels off.
Boil-and-Bite Fitting Steps
-
Boil water and let it rest: Bring water to a rolling boil, then remove from heat and let it sit for 30 seconds. Water that’s too hot can warp the guard unevenly.
-
Submerge the mouthguard: Drop the guard in and leave it for 60 to 90 seconds (check the product instructions, some models need shorter times).
-
Remove and cool briefly: Use a slotted spoon to pull the guard out, then dip it in cool water for 1 to 2 seconds so it won’t burn your mouth.
-
Position and bite firmly: Place the guard over your upper teeth, bite down hard, and press the material against your teeth and gums with your fingers and tongue. Hold for 20 to 30 seconds without shifting your jaw.
-
Set in cold water: Remove the guard and immediately place it in a bowl of cold water to lock the shape.
-
Test the fit: Put the guard back in. If it feels loose, bulky, or uneven, reheat and remold. Don’t settle for a poor fit.
-
Trim excess material: Some guards have extra material at the edges. Trim carefully with scissors to improve comfort without cutting into the protective zones.
Common mistakes: rushing the cooling step (burns your mouth or melts the shape), not pressing firmly enough (guard doesn’t conform tightly), and accepting a loose fit instead of remolding. If the guard doesn’t feel secure after two tries, consider a different model or moving to a custom option.
Lifespan, Maintenance, and Replacement Timing
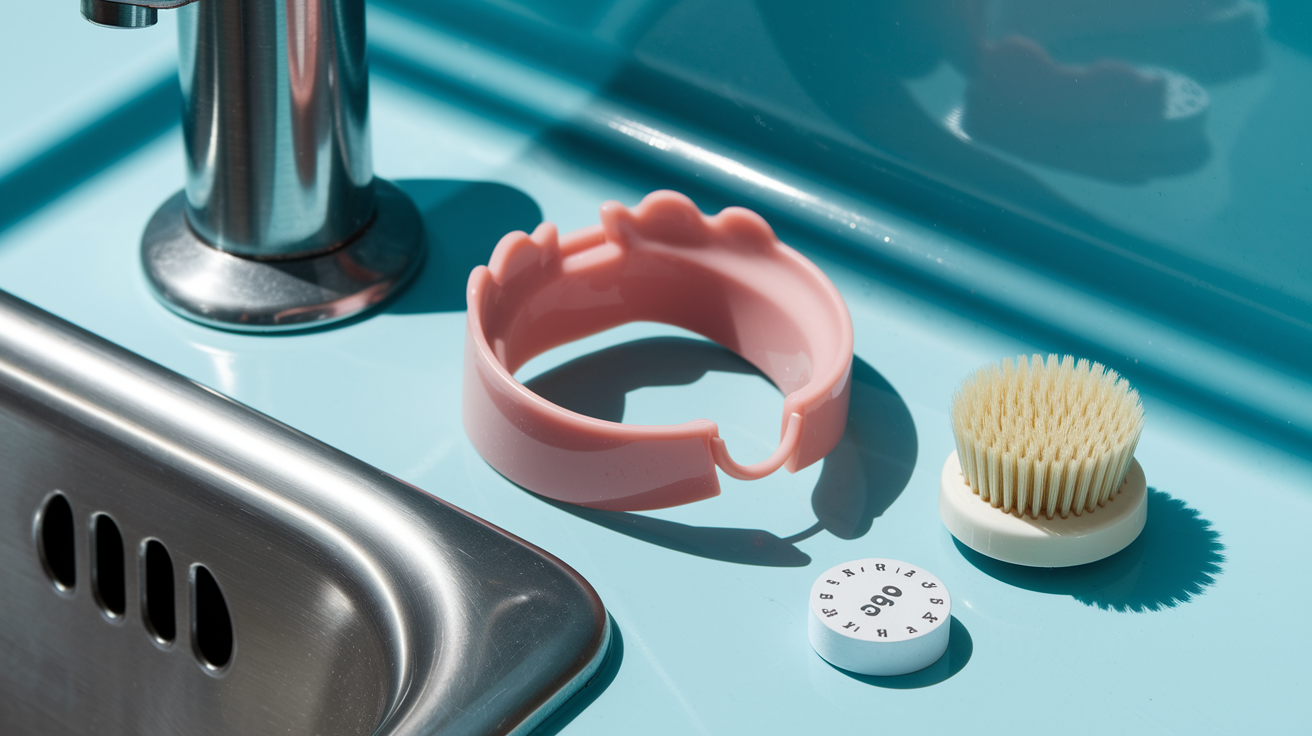
A mouthguard that isn’t clean becomes a bacteria factory. Saliva, food particles, and the warm environment of your gear bag create perfect conditions for bacterial growth. Rinse your guard under cool water immediately after every use. Don’t wait until you get home. Brush it gently with a soft toothbrush (no toothpaste, which can scratch the surface and create places for bacteria to hide), then let it air dry completely before storing it in a ventilated case.
Never leave your mouthguard in a hot car, near a heater, or in direct sunlight. Heat warps the material and destroys the fit. Store it in a hard, vented case that allows airflow while protecting the guard from getting crushed in your bag. Do a deep clean periodically with a denture cleaner or antimicrobial rinse, especially if you notice buildup or odor.
Essential cleaning habits:
Rinse immediately after use: Cool water removes fresh saliva and debris before it dries.
Brush gently without toothpaste: A soft brush keeps the surface smooth. Toothpaste is too abrasive.
Air dry completely: Moisture trapped in a closed case promotes bacterial growth.
Store in a vented case: Protects the guard and allows airflow.
Deep clean weekly: Use a denture tablet or antimicrobial soak.
Avoid heat exposure: Keep the guard away from hot environments that warp the material.
Custom mouthguards typically last 2 to 3 seasons with proper care. Boil-and-bite guards usually need replacement every season, sometimes sooner if you play year-round or grind your teeth. Replace any guard that feels loose, shows visible wear, has cracks, or no longer fits securely. Youth players will need new guards as their teeth change. Players with braces require special models designed to fit over brackets and wires. Never use a standard boil-and-bite guard with braces.
Choosing the Right Mouthguard for Youth vs Adult Hockey Players

Youth players outgrow mouthguards fast. Teeth shift, new molars come in, and a guard that fit perfectly in September might be loose by January. For that reason, boil-and-bite guards make financial sense for most youth hockey families. Spending $25 to $35 on a quality boil-and-bite model and replacing it once or twice a season is more practical than investing $150 to $300 in a custom guard that won’t fit in six months.
Adults with stable dentition benefit from the durability and performance of custom mouthguards. If your teeth aren’t changing and you plan to play for multiple seasons, the upfront cost spreads out over years of use. Custom guards also make sense for adults who have had dental work: crowns, bridges, implants that would be expensive to repair or replace after an on-ice injury.
League type matters. If you’re playing in a checking league at any age, the higher impact forces and collision frequency justify the better protection and retention of a custom guard. In non-checking or recreational leagues, a well-fitted boil-and-bite offers adequate protection without the investment.
Quick recommendations:
Youth in non-checking leagues: Quality boil-and-bite guard. Replace as needed when teeth change.
Youth in checking leagues: Custom guard if budget allows. Otherwise, premium boil-and-bite with regular replacement.
Adult recreational players: Boil-and-bite is usually sufficient. Upgrade to custom if comfort or fit becomes an issue.
Adult competitive or checking-league players: Custom guard for better protection, retention, and long-term value.
Cost-Benefit Analysis: Long-Term Value of Custom vs Boil-and-Bite

Custom mouthguards cost $100 to $500. Boil-and-bite guards cost $15 to $50. On the surface, boil-and-bite looks like the budget-friendly choice. Over time, the math shifts. A custom guard that lasts 2 to 3 seasons costs roughly $50 to $250 per season. A boil-and-bite guard replaced every season costs $15 to $50 per season. If you’re replacing a boil-and-bite guard twice a season because it wears out or loses its fit, the annual cost can approach or exceed the annualized cost of a custom guard.
The real cost-benefit calculation includes injury prevention. A single dental injury requiring an implant costs $3,000 to $6,000. Root canals, crowns, and orthodontic repairs add up fast. If a custom mouthguard reduces your injury risk even slightly, the $100 to $500 investment pays for itself the first time it prevents a cracked tooth or fractured jaw.
Some dental insurance plans cover part of the cost of a custom mouthguard, especially if you have a history of dental trauma or TMJ issues. Check with your provider before assuming it’s all out-of-pocket.
| Factor | Custom Mouthguard | Boil-and-Bite Mouthguard |
|---|---|---|
| Initial Cost | $100–$500 | $15–$50 |
| Typical Lifespan | 2–3 seasons | 1 season (often less with heavy use) |
| Annualized Cost | $50–$250/season | $15–$100/season (if replaced multiple times) |
Custom becomes more economical when you play frequently, compete in checking leagues, or want the best possible fit and protection without replacing guards every few months. If you’re a recreational player or a youth with changing teeth, boil-and-bite guards remain the practical short-term choice. Just factor in the replacement cycle and recognize that fit quality and protection have limits.
Final Words
You’re choosing a guard now, protection, fit, cost, and lifespan matter. Custom models ($100–$500) fit best, absorb shock, and last 2 to 3 seasons. Boil-and-bite options ($15–$50) are cheaper, mold fast, and suit kids who outgrow gear.
Play in checking leagues or have dental work? Go custom for better retention, breathing, and shock dispersion. For rec or growing youth, a well-molded boil-and-bite is a practical choice. Replace it every season.
Remember this simple rule. Mouthguard types compared custom vs boil-and-bite for hockey players. Choose the one that keeps your teeth safe and lets you play confidently.
FAQ
Q: What type of mouthguard is best for hockey players?
A: The best mouthguard for hockey players is a custom-fitted model that offers superior shock absorption, retention, breathing, and communication; costs $100–$500 and typically lasts 2–3 seasons.
Q: Why does Matthew Tkachuk chew his mouth guard?
A: Matthew Tkachuk chews his mouthguard as a personal habit for focus and comfort and to keep the guard seated between shifts; players also chew mouthguards to relieve jaw tension.
Q: How do most hockey players lose their teeth?
A: Most hockey players lose teeth from direct contact — pucks, sticks, high-sticks, collisions, or falls into the boards or ice; players without mouthguards are about 60× more likely to suffer dental injuries.
Q: Can I wear a mouthguard with Invisalign?
A: You can wear a mouthguard with Invisalign, but remove aligners before play and use a properly fitted mouthguard — preferably custom; check with your orthodontist to avoid tray damage and ensure protection.