
Think your hands alone make you a slick stickhandler? Think again.
Your stick’s curve pattern (where the blade cups the puck) and flex rating (how easily the shaft bends) change how the puck sits, lifts, and rolls on the blade.
Pick the wrong combo and your toe drags stall. Pick the right combo and tight-space moves feel automatic.
This post breaks down which curves and flexes speed up puck control at each skill level and gives simple setups to try on the ice.
How Curve Patterns and Flex Ratings Affect Puck Control (Quick Breakdown)
Your stick’s curve pattern decides how the puck sits on your blade and how easily you can cup, lift, and flick it. Curves change how quickly you pull the puck into your body, how tight your toe drags feel, and how much spin you get on quick passes. Flex rating affects how much energy you can load into the shaft and how responsive the blade feels when you’re moving the puck fast.
Lower flex numbers bend easier under light pressure. That helps with quick puck movement and soft-touch handling in tight spaces. Higher flex gives you more resistance and stability, which supports power shots but sometimes cuts into the precision you need for close-control moves. When curve and flex work together, you get faster hands and cleaner puck retention.
Core effects of curve and flex on handling:
Curve depth: Deeper cups make it easier to cradle and protect the puck, but they can complicate backhand control.
Curve location: Toe curves favor quick lifts and dekes. Mid curves balance control and passing. Heel curves add stability.
Flex load: Softer flex responds faster to small wrist movements during stickhandling drills.
Energy release: Stiffer flex gives you a firmer platform for one-timers but requires more force to feel responsive on quick touches.
Curve Pattern Types and How They Shape Puck Handling
Curve patterns break down by where the arc sits on the blade and how open the face angle runs. Each type changes the mechanics of how you gather, hold, and release the puck during live play.
Toe curves concentrate the bend near the blade tip. They’re excellent for quick toe drags because the pronounced cup at the end catches the puck easily and lets you roll it back toward your body. Players who rely on dekes in traffic and rapid toe-to-heel moves find toe curves responsive. When you need to pull the puck through a defender’s skates, a toe curve gives you that instant grab.
Mid curves place the arc in the center of the blade, creating a balanced pocket for stickhandling, passing, and forehand shots. They offer smoother transitions between controlling the puck and releasing it because the contact patch stays consistent as you rotate your wrists. Mid curves suit playmakers who value pass accuracy and two-way forwards who switch between offense and defense quickly.
Heel curves push more bend toward the base of the blade. This setup increases the contact area when you receive hard passes or one-timers, reducing bobbles. Heel curves provide stability during board battles and long passes but feel less dynamic for tight toe-control moves. Defensemen and power shooters use heel curves to manage heavy pucks and generate slap-shot torque.
Lie angle affects how much of your blade contacts the ice when you skate in your natural stance. Common lie numbers run 4, 5, and 6. Lower lies (4) fit crouched skating postures with the puck out in front. Higher lies (6) match upright skaters who keep the puck close. When your lie matches your posture, the blade sits flat during stickhandling, giving you predictable puck control and smoother transitions.
Five curve types and their handling traits:
Shallow toe: slight toe bend, easier backhand passing, moderate lift capability, good for all-around control.
Deep toe: pronounced toe cup, maximum lift and toe-drag response, weaker backhand accuracy.
Mid moderate: centered arc with moderate depth, balanced stickhandling and pass precision, versatile for most moves.
Mid deep: centered arc with deeper pocket, superior puck cradling and spin generation, requires practice for backhand work.
Heel: bend near blade base, stable receiving and power shots, less suited for rapid toe manipulations.
Understanding Stick Flex and Its Impact on Control
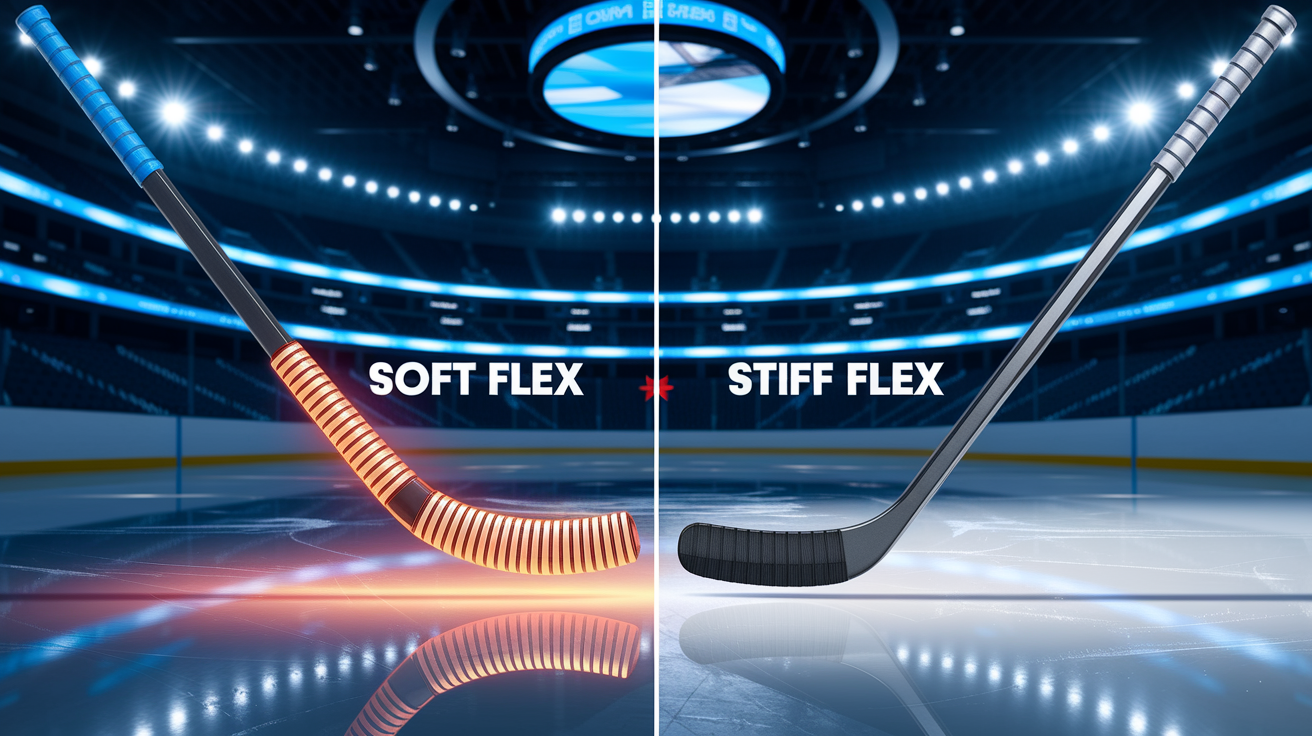
Flex ratings measure how many pounds of force you need to bend the shaft one inch. Lower numbers (40–60) mean the stick bends easily under light pressure. Higher numbers (85–110) require more strength to flex and provide a stiffer platform. That difference changes how the blade responds when you handle the puck at speed.
Softer flex sticks bend during quick wrist movements, which helps you load and release energy faster in tight stickhandling sequences. When you execute a toe drag or a quick pull-and-push move, a lower flex gives you more blade wrap around the puck, increasing feel and control. Players with quick hands often choose flex ratings 5 to 15 points below the standard body-weight-divided-by-two rule to maximize responsiveness. If you want your blade to feel alive during dekes, drop your flex a notch.
Stiffer flex sticks resist bending, so they deliver more predictable contact during one-timers and hard passes. But that rigidity can make soft-touch handling less forgiving because the blade doesn’t cushion the puck as much on receptions or gentle rolls. Power shooters and defensemen prefer higher flex for stability, but forwards focused on dangles and quick passes typically benefit from softer setups.
| Flex Range | Handling Outcome |
|---|---|
| 40–60 | Quick blade response, easier soft-touch moves, reduced power on heavy shots |
| 65–80 | Balanced control and shot strength, suits most skill players |
| 85–110+ | Maximum stability and power, requires more force for quick handling adjustments |
Matching Curve and Flex to Skill Level
Beginners should start with a moderate mid curve and a flex rating near their body weight divided by two. That combination delivers predictable puck feel, manageable lift on passes, and a forgiving blade that doesn’t punish small technique errors. A mid curve with neutral depth helps new players learn both forehand and backhand skills without fighting extreme blade geometry.
Intermediate players who have consistent stickhandling fundamentals can experiment with slightly deeper curves or toe patterns to add deception and quicker lifts. Dropping flex by 5 to 10 points below the body-weight rule often improves quick-release shots and tighter puck control during transitions. At this stage, players know their preferred moves well enough to choose a curve that amplifies specific strengths. Playmakers might lean toward mid curves for pass accuracy, while forwards who attack wide may prefer toe curves for toe drags.
Advanced players frequently use aggressive toe curves paired with softer flex to maximize deception and rapid puck manipulation. Elite handlers can manage the trade-offs of deep curves (weaker backhands and demanding precision) because their mechanics are refined. Many advanced setups run flex 10 to 15 points softer than the standard formula, creating a whippy feel that rewards quick hands and inventive moves.
Recommended setups by skill tier:
Beginner: Mid curve (moderate depth), lie 5, flex = body weight (lb) ÷ 2, focus on learning both sides of the blade.
Intermediate: Mid or slight toe curve, moderate-to-deep depth, lie 5–6, flex 5–10 points softer than weight rule, emphasis on preferred move patterns.
Advanced: Toe or deep mid curve, open face if desired, lie 5–6, flex 10–15 points softer, tailored to specific handling style and deception tactics.
Choosing Stick Specs Based on Desired Handling Outcomes

If your primary goal is executing tighter toe drags and quick pull moves in traffic, a toe curve with a deeper pocket and softer flex will give you the instant puck grab and blade responsiveness you need. The pronounced cup at the tip catches the puck faster, and the flexible shaft lets you load and release energy during the drag without losing control. Players who thrive on deception and one-on-one moves see immediate gains from this combination.
For smoother transitions between receiving hard passes and distributing the puck quickly, a mid curve with moderate depth and balanced flex offers the most consistent contact patch. You won’t fight unpredictable bounces on receptions, and your release timing stays reliable across wrist shots, snap shots, and saucer passes. This setup suits playmakers and two-way forwards who need to handle the puck cleanly under pressure and make fast decisions.
When you want maximum control during board battles and puck protection along the wall, a mid or heel curve paired with slightly stiffer flex provides the stability to shield the puck and absorb contact. The larger contact area near the heel reduces bobbles when opponents stick-check you, and the firmer shaft resists twisting when you lean into body positioning. Grinders and net-front players use this approach to win races and maintain possession in tight spaces.
If rapid-fire stickhandling and quick hands are your focus, prioritize softer flex over curve extremes. A flex rating 10 to 15 points below your standard calculation creates a blade that responds instantly to small wrist adjustments, letting you execute fakes, roll moves, and rapid puck transfers with minimal effort. Pair that flex with a curve that matches your natural hand position (usually a mid or slight toe) and you’ll feel the puck stay glued to your blade through complex sequences.
Comparison Criteria When Selecting Your Stick Setup

Start by testing how the blade feels when you receive a pass at different speeds. A good handling stick cushions hard passes without letting the puck bounce away, and it grips soft feeds cleanly so you can transition immediately into your next move. If the blade feels too stiff or too loose during receptions, the curve depth or flex rating may not match your touch.
Check puck dampening by rolling the puck back and forth across the blade face while stationary. You should feel consistent resistance and hear a quiet contact sound. Excess vibration or a hollow feel suggests the curve shape or lie angle isn’t sitting flat on the ice in your natural stance. Adjust lie or try a different curve location to improve blade-ice contact.
Evaluate responsiveness by performing quick toe drags, pull-and-push sequences, and rapid lateral moves. The blade should rotate smoothly under your top hand without fighting you, and the puck should stay in the sweet spot of the curve throughout the motion. If you’re losing the puck mid-move or the blade feels sluggish, the flex may be too high or the curve pocket may not align with your hand mechanics.
Five comparison criteria to apply:
Blade feel on receptions: Does the puck settle cleanly, or does it skip and bobble?
Puck dampening: Consistent resistance and quiet contact during rolls and cradles.
Responsiveness: Smooth, quick blade rotation during toe drags and fakes without fighting your hands.
Lie stability: Blade sits flat in your skating stance, no rocking on heel or toe.
Flex load ease: Can you load the shaft during stickhandling moves without excessive effort?
On-Ice Testing Tips to Finalize Your Curve and Flex Choice

Bring two or three candidate sticks to the ice and run the same controlled drills with each setup. Start with a five-minute warm-up of basic stickhandling to get your hands loose, then move into specific tests that isolate curve and flex performance. Switching sticks mid-session lets you feel differences immediately while your muscle memory is fresh.
Test controlled stickhandling by weaving through a line of five cones spaced three feet apart at moderate speed. Focus on how easily the puck stays on your blade through tight turns and whether the blade responds to small wrist adjustments. If one stick lets you complete the pattern without losing the puck, note which curve location and flex rating it carries. Repeat the drill three times per stick to confirm consistency.
Four on-ice tests to run:
Puck-protection drill: Skate a small circle while cradling the puck close to your body, simulating contact pressure. The stick with better puck retention and smoother blade control wins this test.
Toe-control test: Execute ten toe drags from forehand to backhand and back. Count how many drags feel clean and controlled. The stick with the highest success rate matches your preferred curve and flex.
Rapid-release touches: Fire ten quick wrist shots from the slot without a full wind-up. The stick that loads and releases fastest with the least effort shows the best flex match for your hands.
Saucer-pass accuracy: Attempt ten saucer passes to a target three meters away. Track how many land flat. The stick with the most accurate results has the right curve depth and lie angle for your passing mechanics.
Final Words
In the action, you learned how curve patterns shape cradle, lifts, and releases, and how flex changes energy loading, quick releases, and close-control feel. We ran through curve types, flex ranges, skill-level matches, and what to test on ice.
Use the comparison criteria and the on-ice drills to narrow options fast.
Pick hockey stick curve and flex choices that improve puck handling by focusing on your primary handling goal—quick hands, toe-drags, or power—and then test two sticks on ice. You’ll notice the difference.
FAQ
How can I improve my hockey puck handling?
You can improve your hockey puck handling by selecting a stick curve and flex that match your skill level and practicing specific control drills. Start with a moderate curve and age-appropriate flex, then work on stationary moves before adding speed and defenders.
What curve is better for handling, P28 or P92?
The P28 curve is better for toe drags and quick hands in tight, while the P92 curve offers more blade-to-ice contact and balanced control across the blade. P92 suits players building fundamentals; P28 fits advanced handlers looking for deception.
What is the best curve for stick handling?
The best curve for stick handling is typically a mid curve like the P92 or P88, which balances puck control across the blade with predictable release points. These curves help newer players develop clean technique before moving to aggressive toe patterns.
What is the P92 curve good for?
The P92 curve is good for balanced puck handling, accurate passing, and consistent shooting because it offers a moderate toe curve with strong blade-ice contact. It suits players at all levels who want reliable control without sacrificing shooting versatility.
What flex rating helps with quick puck movement?
A lower flex rating helps with quick puck movement by bending more easily during stickhandling, allowing faster energy transfer and softer touch on the puck. Youth players often use 40-60 flex; lighter adults may prefer 65-75 for quicker hands.
How does lie angle affect puck control?
Lie angle affects puck control by changing how much blade surface contacts the ice during handling. A lie that’s too high or low lifts part of the blade, reducing stability and making cradles and passes less predictable.
Should beginners use a toe curve or mid curve?
Beginners should use a mid curve because it provides more forgiving blade contact and helps develop fundamental skills like passing and receiving. Toe curves add deception but require clean technique to avoid rolling pucks or losing control.
Can stick flex improve stickhandling speed?
Stick flex can improve stickhandling speed when matched correctly to your strength, as a softer flex loads and releases energy faster during quick touches. Too stiff slows responsiveness; too soft loses stability in tight control situations.
How do I test a new stick curve on ice?
You test a new stick curve on ice by running stationary stickhandling, toe drags, puck protection under pressure, and quick-release touches to feel how the blade cradles and releases. Compare blade contact, puck dampening, and control consistency across different handling situations.