
If you skip structured film work, you’re handing games to the other coach.
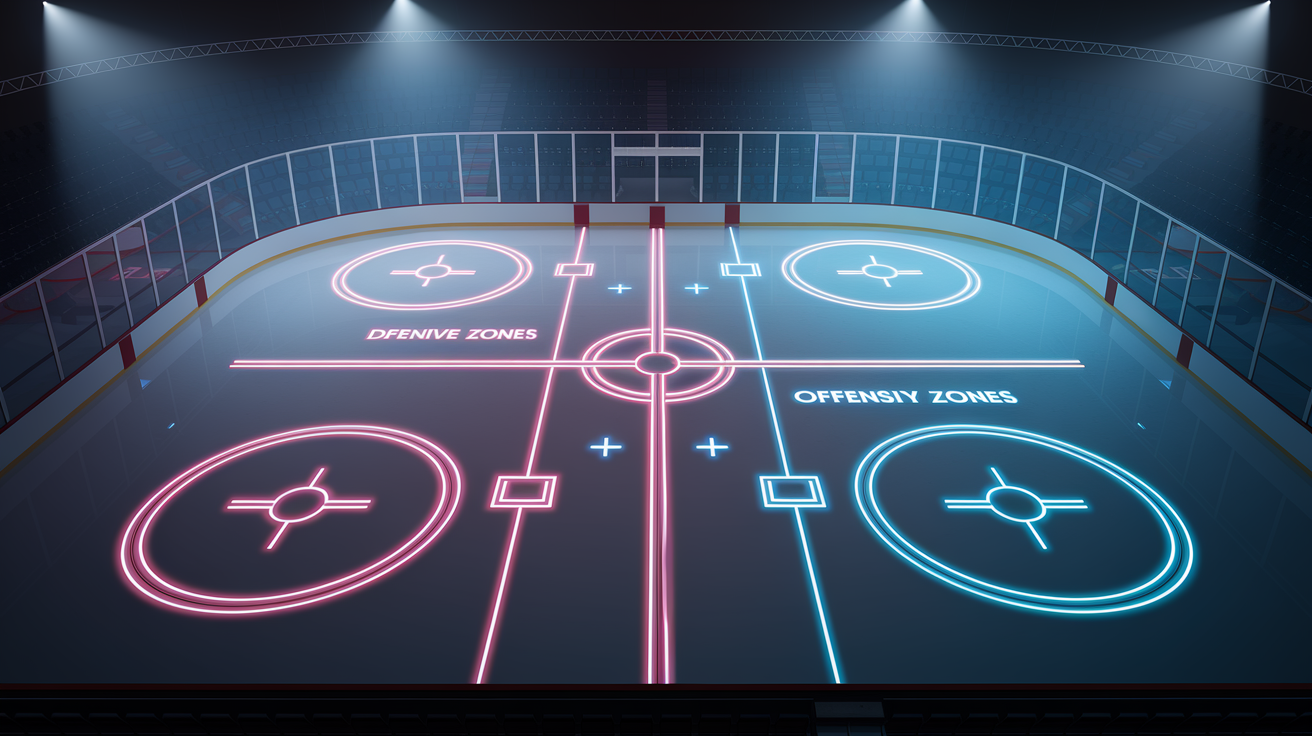
Hockey moves faster than we can process, shifts last about forty five seconds and a scoring chance can appear in three seconds.
This guide gives coaches a simple, repeatable film workflow, what to watch, how to tag and cut quick teaching reels, and how to link video directly to on ice drills so you fix patterns, not just moments, and win more shifts.
Why Film Analysis Separates Good Coaches from Great Ones

Hockey moves fast. A shift lasts forty-five seconds. A scoring chance develops in three. By the time you process what just happened, the puck’s already back in the neutral zone and your defense is rotating again.
That speed is why film exists.
Video slows the game down. It lets you break a shift into discrete decisions. Where a winger supported the puck, when a defenseman opened his hips, how quickly a forward released after receiving a pass. Rush by rush, possession by possession, film turns chaos into teachable moments.
Coaches who systematically analyze game footage identify patterns invisible in real time. They spot the recurring gap problem that leads to odd-man rushes. They catch the power play passing lane that keeps closing because one player drifts two feet too deep. They see which opponent defenseman panics under forecheck pressure and which one consistently makes the first pass.
Film also closes the feedback loop faster and more precisely than verbal instruction alone. A player hears “support the puck” and nods. That same player watches three clips showing the exact moment they were too far behind the play, sees the turnover that followed, and suddenly the concept clicks. The evidence is right there, frame by frame.
The difference between teams that use film and teams that review film is structure. Random clips and hour long meeting room marathons waste time and overload players. Systematic tagging, short reels, and targeted teaching points turn footage into wins.
This guide walks through the complete film analysis workflow: what to watch for, how to tag and organize clips, which tools to use, how to present findings, and how to tie video sessions directly to on ice improvement. It’s built for coaches at any level, whether you’re working with one borrowed camera and free software or a full multi angle system.
The Complete Game Film Workflow: From Raw Footage to Teaching Moments

A repeatable process is the foundation of effective film work. Without a system, you end up with scattered clips, inconsistent tagging, and no clear way to turn footage into focused instruction.
Here’s the step by step method used by coaches across youth, high school, junior, and professional hockey.
Step 1: Pre Game Scouting (60 to 120 minutes)
Before your own game, collect opponent footage. Look for full games if available, plus isolated power play and penalty kill clips. Identify one to four primary threats. Their top scorer, their best puck moving defenseman, their most aggressive forechecker. Note set piece tendencies. Pay attention to breakout patterns, preferred zone entries, and how they respond to pressure.
This prep work gives your players a visual reference before the game and focuses your own in game attention on confirming or adjusting your scouting report.
Step 2: Ingest Footage (30 to 90 minutes per angle)
After your game, transfer video files into your analysis software. If you’re working with a single fixed angle, expect thirty to ninety minutes to ingest and organize the footage. Multi angle setups add thirty to sixty minutes per additional camera.
Sync angles if you have more than one feed. Trim dead time. Long stoppages, intermissions. So your working timeline includes only live play and relevant dead puck moments like faceoffs and line changes.
Step 3: Tag Events Using Standardized Codes
This is where systematic film work begins. Create a codebook, a consistent shorthand for recurring events. Common codes include:
FO = faceoff
ZE = zone entry
TO = turnover
HD = high danger chance
OMR = odd man rush
PP = power play
PK = penalty kill
As you watch, log each event with a timecode and the angle. For example, “12:34 / Angle A / ZE – successful carry.” Rate execution on a simple 1 to 5 scale if it helps you prioritize clips later.
Expect to record twenty to one hundred discrete events per game for a concise scouting product. A detailed breakdown might involve one hundred to three hundred tags, depending on how granular you want to go.
Step 4: Chart Metrics into a Spreadsheet
Transfer your tagged events into a master spreadsheet. Track per game columns for shots on goal, high danger chances, turnovers, successful entries, and zone start percentages for each player. Calculate rates. Zone entry success percentage, odd man rushes allowed per game. To quantify patterns.
Numbers make the abstract concrete. “We had too many turnovers” is vague. “We had eight defensive zone turnovers leading to four high danger chances” is a coaching point you can fix.
Step 5: Produce Two Outputs
Create a quick three to five minute “what to fix” reel within twenty four hours. Include three to five clips, each twenty to sixty seconds long, focused on the most urgent teaching points. Attach a one line takeaway to each clip and send it to the team via your platform or shared folder.
Then build your full tagged library and a longer session reel, fifteen to forty minutes, within forty eight to seventy two hours. This deeper breakdown covers positioning, transitions, special teams, and situational play. You’ll use it in practice meetings and for individual reviews.
Step 6: Present in Practice
Run a ten to twenty minute team video meeting focused on three priorities. Show two examples per point, one correct execution, one mistake, and pause at critical decision moments to ask players what they see.
Follow immediately with ten to twenty five minute on ice drills that replicate the video scenarios. If the film showed poor gap control, run a gap control circuit. If entries were sloppy, drill zone entries against heavy pressure.
For individual reviews, schedule ten to twenty minutes per player. Show three clips and walk through a two to three step action plan.
Step 7: Track and Adjust
Revisit your spreadsheet weekly to identify trends. Are turnovers decreasing? Are high danger chances improving? Monthly reports, compiled every four to six weeks, guide larger tactical adjustments. Changing breakout schemes, rotating defensive pairs, or shifting power play formations.
This seven step loop, scout, ingest, tag, chart, produce, present, track, turns raw footage into measurable on ice improvement. Stick to the system and film stops being a chore. It becomes your most reliable teaching assistant.
What to Watch For: Tactical Focus Areas and Tagging Priorities
Knowing how to tag is only useful if you know what to tag. Game film contains hundreds of moments. Your job is to isolate the ones that matter. The decisions and executions that directly affect scoring chances, possession, and defensive integrity.
Here’s what to watch for, broken into defensive, offensive, transition, special teams, and situational categories.
Defensive Focus Areas
Gap control is the foundation of defensive structure. Watch how close your defensemen stay to the puck carrier in the neutral zone. If the gap is too loose, more than a stick length, the attacker has time and space to make a play. If it’s too tight and the defender’s hips are closed, a quick move beats them wide. Tag every instance where gap control breaks down and leads to a clean entry or odd man rush.
Positioning in the defensive zone matters just as much as effort. Look for players caught between assignments, drifting toward the puck but not committing, leaving the slot open or the net front unguarded. Tag defensive zone turnovers separately. A giveaway in your own end often leads directly to a high danger chance, so count them and chart who made the mistake and what caused it. Poor support, misread pressure, weak pass.
Backchecking speed and commitment show up clearly on video. Note which forwards consistently beat opponents back to the defensive zone and which ones coast or peel off early.
Offensive Focus Areas
Zone entries are the gateway to sustained offensive pressure. Tag every entry and classify it: successful carry, successful chip and chase, dump with no recovery, or turnover at the blue line. Calculate your team’s entry success rate. If it’s below fifty percent, your neutral zone play needs work.
Inside the offensive zone, watch puck support and cycle execution. Are your forwards maintaining triangles? Is the weak side winger available for a quick reversal? Are players going to the net, or are they standing still waiting for a perfect pass?
Shot selection matters. Tag high danger chances, defined as shots from the slot, one timers, rebounds, and odd man rushes, and compare them to low percentage shots from the perimeter. Quantity alone doesn’t win games. Quality does.
Transition Focus Areas
Neutral zone gaps, stretch passes, and support angles dictate whether you generate offense off the rush or give it up going the other way. Tag odd man rushes both for and against. Count how many you create per game and how many you allow. A team that generates three odd man rushes and gives up one is controlling transitions. A team that gives up three and generates one is bleeding chances.
Watch how quickly your team transitions from offense to defense. When you lose the puck in the offensive zone, do your forwards pressure immediately, or do they drift back slowly and allow a clean breakout?
Special Teams Focus Areas
Power play formations reveal patterns. Tag every power play sequence: initial setup, first pass, puck movement, shot attempts, and whether the goalie was forced to move side to side. Note which passing lanes consistently open and which get clogged.
On the penalty kill, watch puck support and zone pressure. Does your box collapse too early, leaving the point open? Are your forwards aggressive on clears, or passive and reactive? Tag successful clears and how they were achieved. Rim, chip, or controlled breakout.
Faceoff execution on special teams is critical. A lost draw on the power play costs ten to fifteen seconds of setup time. A lost draw on the penalty kill often leads to an immediate high danger chance.
Situational Focus Areas
End of period sequences and line changes are common breakdown moments. Tired players make poor decisions. Tag turnovers and goals allowed in the final two minutes of each period. Chart which players were on the ice.
Penalty timing is another lever. Did a penalty kill momentum after a strong shift? Was it a retaliation penalty that could have been avoided? Tag and review every penalty to identify patterns. One player taking bad penalties, or an opponent who draws calls effectively.
Line matchups matter at higher levels. If your top line is consistently getting caved in against an opponent’s checking line, that’s a tactical adjustment you can make between periods or in the next game.
By categorizing and tagging these focus areas systematically, you turn a two hour game into a library of teachable moments sorted by theme. You’ll know exactly where to look when it’s time to build a reel.
Tagging and Note Taking Systems That Save Time

The difference between efficient film work and endless rewatching is a consistent tagging system. Without standardized codes and a clear note taking structure, you’ll waste hours hunting for clips and trying to remember what you saw.
Here’s how to build a system that scales.
Create a Standardized Event Codebook
Use short, repeatable abbreviations for every recurring event. Your codebook should cover:
FO = faceoff
ZE = zone entry
TO = turnover
HD = high danger chance
OMR = odd man rush
PP = power play
PK = penalty kill
GC = gap control issue
DZT = defensive zone turnover
BC = backcheck (strong or weak)
Add codes specific to your system. If you run a 1-2-2 forecheck, create an F12 code to tag sequences where it succeeds or fails. If you emphasize stretch passes, use SP to mark every attempt and note the outcome.
Consistency is everything. If you tag a defensive zone turnover as TO one game and DZT the next, your tagged library becomes unsearchable. Stick to your codebook every session.
Log Timecode, Angle, and Context
Every tag should include three pieces of information: the timecode (e.g., 12:34), the camera angle if you’re working with multiple feeds (e.g., Angle A), and a brief descriptor (e.g., “ZE – successful carry, left side”). This format makes it easy to locate the clip later and understand what you were tracking.
Example log entry:
12:34 / Angle A / ZE – successful carry, left side
14:02 / Angle A / DZT – weak pass under pressure, led to HD chance
If you’re tagging manually, keep a running document or spreadsheet open beside your video window. If your software supports in app tagging, use it. Most platforms let you assign tags, add notes, and jump directly to tagged moments later.
Rate Plays on a Simple 1 to 5 Scale
Not every tagged moment is equally important. A 1 to 5 rating scale helps you prioritize when building reels. Use:
5 = textbook execution, worth showing as a positive example
3 = neutral or mixed; correct decision, average execution
1 = clear mistake, high teaching value
This scale lets you quickly filter your library. Need three examples of strong gap control? Pull up your GC tags rated 4 or 5. Need clips showing entry failures? Search ZE rated 1 or 2.
Maintain a Master Spreadsheet
Transfer your tagged events into a game by game spreadsheet. Use columns for:
Player name
Event type (FO, ZE, TO, HD, OMR, etc.)
Timecode
Rating (1 to 5)
Outcome (goal, chance, turnover, successful play)
Notes (brief context)
At the end of each game, calculate per player and per team metrics:
Shots on goal
High danger chances
Turnovers (total, and specifically in the defensive zone)
Successful entries vs. failed entries
Zone start percentage (offensive vs. defensive)
Odd man rushes for and against
Example summary row:
Game 5 vs. Team X: 28 shots, 9 HD chances, 6 turnovers (4 in DZ), 14/22 successful entries (64%), 2 OMR for / 3 OMR against
This summary becomes your coaching dashboard. Trends jump out quickly. If defensive zone turnovers are climbing week over week, you know where to focus practice.
Organize Tagged Clips by Theme
Most analysis software lets you create playlists or bins. After tagging a game, sort your clips into theme based folders:
Breakouts (good and bad)
Zone entries (successful and failed)
Defensive breakdowns
Power play sequences
Penalty kill clears
Highlight reel plays
Thematic organization speeds up reel creation. When you need to build a three minute session on breakouts, you’re pulling from a pre sorted folder instead of scrubbing through two hours of footage.
Delegate Initial Tagging When Possible
If you have assistant coaches or video interns, divide the workload. One person tags offensive events, another tags defensive events, a third handles special teams. Expect one to three hours per game depending on detail level. Splitting the work keeps turnaround fast and prevents bottlenecks.
A systematic tagging and note taking workflow turns raw footage into a searchable, actionable library. You’ll spend less time hunting for clips and more time teaching.
Tools and Software: Free, Freemium, and Professional Options

The right tool accelerates your workflow. The wrong one creates friction. Here’s a breakdown of software options across budget levels, with notes on features, costs, and automation.
Free and Open Source Tools
Kinovea is the go to free option for basic slow motion playback and on screen drawing. It handles most video formats, lets you scrub frame by frame, and includes simple telestration. Lines, circles, arrows. If you’re starting out or working on a zero budget, Kinovea covers the essentials. It won’t handle advanced tagging or multi angle sync, but for building short reels with annotations, it works.
VLC Media Player is another free option. It’s a playback tool, not an analysis platform, but it supports precise timestamps and variable playback speed. Use it to log timecodes manually while watching, then transfer those notes to a spreadsheet. It’s low tech, but functional.
ShotCut and DaVinci Resolve are free video editors useful for compiling clips into highlight reels. Neither is built specifically for sports analysis, but both handle trimming, arranging sequences, and exporting finished videos. DaVinci Resolve has a steeper learning curve but offers more polished output.
Freemium and Subscription Platforms
Hudl is the most widely used team focused platform in North American hockey. It offers cloud storage, tagging, telestration, playlist creation, and team management integration. Pricing varies by package and team size. Expect costs to range from a few hundred to over a thousand dollars per season depending on features and user count.
Hudl’s standout feature is Hudl Assist, an AI powered auto tagging tool. Assist watches your uploaded game footage and automatically tags common events. Shots, saves, turnovers, zone entries. Accuracy depends on camera angle and sport specific training, but when it works well, it cuts manual tagging time by fifty to eighty percent. You still review and refine the tags, but the grunt work is done.
LongoMatch offers both free and paid tiers. The free version supports basic tagging and playlist creation. Paid tiers add advanced analytics, multi angle sync, and export options. It’s particularly popular in Europe and among teams that want a middle ground between free tools and enterprise platforms.
Professional and Enterprise Solutions
SportsCode (by Hudl) and Dartfish are the professional grade standards. Both offer frame by frame playback, robust telestration, advanced tagging and coding workflows, multi angle sync, and integration with analytics platforms. Licensing costs typically range from hundreds to thousands of dollars per seat annually, making them a fit for college, junior, and professional programs with dedicated video staff.
These platforms shine when you need to handle large volumes of footage, produce detailed statistical breakdowns, and coordinate analysis across multiple coaches. The learning curve is steeper, but the depth of functionality justifies the investment at higher levels.
Automation and AI Assisted Tagging
AI tools like Hudl Assist are changing the workflow. Instead of manually tagging every shot, entry, and turnover, the software does the first pass. You review, correct, and refine. This approach is especially valuable for multi game weeks or tournaments where time is tight.
Expect automation to reduce human tagging time by roughly fifty to eighty percent, depending on camera quality, angle consistency, and how well the AI model is trained for hockey. The technology improves every season, so even mid tier platforms are starting to offer some level of auto detection.
Choosing the Right Tool for Your Level
If you’re coaching youth hockey with one parent filming games on a tablet, start with Kinovea and a spreadsheet. It’s free, functional, and teaches you the tagging discipline that matters more than the software.
If you’re at the high school or tier level junior stage and video is a regular part of your program, a Hudl subscription makes sense. The time saved on tagging and distribution justifies the cost, and the platform grows with your needs.
If you’re working in college or professional hockey with dedicated video staff and multi angle setups, SportsCode or Dartfish are the standards. The investment pays off in depth, speed, and integration with broader analytics infrastructure.
The best tool is the one you’ll actually use. Start simple, build your system, and upgrade when the workflow demands it.
Building Highlight Reels and Scouting Packs: Structure and Length

A highlight reel is only useful if it’s focused, short, and tied to a clear teaching point. Long, unfocused video sessions lose player attention and dilute the message. Here’s how to structure reels that work.
Team “What to Fix” Reel (3 to 5 minutes)
This is your quick turnaround product. Aim to deliver it within twenty four hours of the game. Include three to five clips, each twenty to sixty seconds long, focused on the most urgent issues.
Structure each clip the same way: show the play, freeze at the critical decision moment, annotate with a line or circle to highlight the key error, and add a one line takeaway. For example, if the problem is poor gap control, show the defender opening up too early, freeze when the gap widens, circle the open ice, and write: “Gap opens here. Attacker gets clean entry.”
Keep the tone direct and constructive. Show what went wrong, explain why it mattered, and tie it to what you’ll practice next. Players should finish the reel knowing exactly what to work on.
Expect to spend thirty to ninety minutes assembling this reel after tagging is complete. It’s fast, focused, and moves the needle.
Full Team Session Reel (15 to 30 minutes)
This deeper breakdown is used in a practice meeting or pre game video session. Limit it to three to five key themes. Breakouts, gap control, power play execution. And show two or three examples per theme.
For each theme, include both correct and incorrect executions. Show a good breakout first, then a failed breakout, then another good one. The contrast makes the teaching point obvious. Pause at decision moments and ask players to describe what they see. “What’s the first option here?” “Where should the weak side forward be?”
Use slow motion and freeze frame liberally. The goal is to make the invisible visible. Subtle positioning errors, timing issues, or a half second of hesitation that leads to a turnover.
Include one or two external examples if they clarify the point. A thirty second NHL clip showing textbook gap control or a clean zone entry can reinforce your teaching without adding much time. Just make sure the example is relevant and clearly analogous to what your team is working on.
Keep the total session under thirty minutes. Fifteen to twenty five minutes is ideal. Anything longer and retention drops.
Individual Player Reel (60 to 90 seconds)
For one on one reviews, build a short reel showing four to six clips: two highlighting strengths, two to four showing areas to correct. Start with the positives. Show the player making a strong play. A good defensive read, a clean zone entry, a smart support angle. Then show the corrections, framed as opportunities: “Here’s where you can get better.”
Keep each clip short, ten to twenty seconds, and annotate key moments. Finish with a two to three step action plan. “This week, focus on staying inside your man in the defensive zone, supporting the puck earlier in transition, and shooting low far side when the goalie cheats.”
Individual reels take ten to twenty minutes to assemble and are among the highest value film tools you have. Players respond to personalized feedback backed by evidence.
Scouting Pack for Opponents (5 to 8 minutes)
When preparing for an opponent, build a focused scouting reel highlighting their set plays, top threats, power play and penalty kill tendencies, and preferred breakout patterns. Include:
Two or three examples of their most common breakout
Clips showing their top scorer’s tendencies (shot side, release speed, preferred zones)
Power play formation and passing patterns
Penalty kill pressure style and common clears
Annotate key details. If their defenseman always looks middle on the breakout, circle that passing lane. If their power play runs a specific set play off the faceoff, show it twice and explain the timing.
Distribute the scouting pack twenty four to forty eight hours before the game so players can watch on their own, then reference it briefly in the pre game meeting.
Distribution and Accessibility
Deliver reels via your team management platform or a shared folder. Hudl, Google Drive, and Dropbox all work. The key is making the reel easy to access on a phone or tablet. If players have to hunt for the link or download special software, they won’t watch it.
For quick turnaround reels, send a direct notification with the video link. For full session reels, post them in the team’s main chat or calendar with a note explaining what the session will cover.
Keep individual reels private. Send them directly to the player with a short personal message. Public critique rarely improves performance; private, constructive feedback does.
Highlight reels work when they’re short, focused, and immediately actionable. Build them with those principles and they become a core part of your coaching toolkit.
Presentation Strategy: Team Meetings, Individual Reviews, and On Ice Integration

Building great reels is only half the work. How you present them determines whether players understand, retain, and apply what they’ve learned. Here’s how to structure video sessions that lead to on ice improvement.
Team Video Meetings (15 to 25 minutes max)
Run team meetings early in practice, before the on ice session, or at the start of the next practice day. Keep the total meeting time between fifteen and twenty five minutes. Attention spans are short, and overloading players with information creates diminishing returns.
Focus on three priorities per session. Each priority should include two or three clips showing the problem or principle, ideally with a side by side comparison of correct versus incorrect execution.
Start each clip by explaining what to watch for. “Watch the weak side forward on this next clip. Notice where he is when the puck gets turned over.” Show the clip, pause at the critical moment, and ask a player to describe what they see. “Where should he be?” “What happens because he’s late?”
Use freeze frame and slow motion to isolate key details. Players miss subtle positioning errors in real time. Slowing the play and pausing at the decision point makes the teaching moment obvious.
Include at least one positive example per priority. If you’re correcting breakouts, show two failed breakouts and one clean breakout. Players need to see what right looks like, not just what’s wrong.
Keep the tone direct and constructive. Avoid sarcasm or public shaming. If a specific player made the mistake, you can reference it. “Johnny, this is you here.” But frame it as a learning moment for the whole team. Save pointed critiques for individual sessions.
End with a clear summary: “This week we’re focusing on supporting the puck earlier, keeping our gaps tight in the neutral zone, and getting to the net on the power play. You’ll see these themes in today’s drills.”
On Ice Follow Up (10 to 25 minutes)
Video sessions are only effective if they connect immediately to practice. After the meeting, run drills that replicate the scenarios you just showed on film.
If the video session covered gap control, run a neutral zone drill where forwards attack defensemen one on one or two on two, and emphasize maintaining the correct gap. If the focus was zone entries, set up a blue line pressure drill where forwards try entries against a forechecking structure.
Reference the video during the drill. “Remember the clip where the gap opened up? That’s what I’m seeing right now. Close it.” The back and forth between film and ice cements the lesson.
Expect to spend ten to twenty five minutes on film driven drills. That’s enough time for players to practice the correction multiple times and start building new habits.
Individual Reviews (10 to 20 minutes)
Schedule individual video sessions for players who need focused feedback. These are especially valuable for young players learning positional responsibilities or veteran players working through specific issues.
Show three clips: two strengths and one or two areas to correct. Start with the positives. “Here you see the play developing early and jump into the rush. That’s exactly what we need.” Then move to corrections. “Now watch this clip. You’re caught flat footed when the puck turns over. Here’s what happens next.”
Use the session to build a short term development plan. “Over the next two weeks, I want you working on three things: staying inside your man in the D zone, supporting the puck earlier in transition, and shooting low far side when the goalie cheats. We’ll check back in after next weekend’s games.”
Individual sessions take ten to twenty minutes and have disproportionate impact. Players respond to personalized, evidence backed feedback. When they see themselves on film making the same mistake three times, the message lands harder than any verbal instruction.
Drill Integration and Reinforcement
The best film programs tie every video session to a corresponding drill or practice sequence. If you show clips about poor puck support, design small area games that reward quick support. If you highlight defensive zone coverage errors, run defensive zone rotations with live pressure.
Create a feedback loop: video identifies the problem, drills provide repetitions, and the next game’s film shows whether the correction is taking hold. Track the metrics week over week. If defensive zone turnovers drop from eight per game to four, the teaching is working.
Avoiding Common Presentation Mistakes
Don’t show too many clips. Five teaching points with three clips each is fifteen clips. Too many. Three points with two or three clips each is manageable.
Don’t drag players through frame by frame analysis of entire periods. It’s boring, exhausting, and ineffective. Show the key moments, explain the principle, and move on.
Don’t only show mistakes. Players tune out if every clip is a lowlight. Balance correction with reinforcement.
Don’t schedule video sessions right before games. Players need time to process and practice corrections. Film sessions work best early in the practice week, with time to drill the concepts before the next game.
Effective presentation turns film from a passive review into an active teaching tool. Keep sessions short, focused, and directly connected to on ice work.
Frame by Frame and Slow Motion: Isolating the Split Second Decisions That Matter
Hockey happens fast. A defenseman’s gap closes in a single stride. A forward releases the puck a half second after receiving it, or hesitates and loses the chance. A goalie moves post to post while the puck is still in mid air.
These split second moments decide games, but they’re invisible at full speed. That’s why frame by frame and slow motion playback are the most powerful features in any analysis tool.
Why Slow Motion Matters
Slowing a play to half speed or stepping through it frame by frame reveals the sequence of decisions and movements that led to an outcome. It shows when a player opened their hips too early, when a pass option appeared and disappeared, or when a defensive rotation broke down.
For example, a goal against might look like bad luck at full speed. Slow it down and you see the weak side winger drifting toward the puck two seconds too early, leaving the back door open. Frame by frame shows the exact moment the rotation should have happened and didn’t.
Coaching Technique and Footwork
Frame by frame is especially useful for teaching technique. Skating mechanics, stick positioning, shooting form. All of these happen too quickly to diagnose in real time.
Show a forward receiving a pass and releasing a shot. Step through it frame by frame. Is the bottom hand sliding down the shaft before the shot, or staying locked? Are the knees bent and weight forward, or is the player standing tall and losing power? Is the stick blade closed or open on contact?
For defensemen, slow motion reveals gap management in detail. Step through a neutral zone one on one frame by frame. When does the defender open his hips? When does the attacker accelerate? How much space is between them at each moment? The correct gap is visible when you slow the play down. So is the mistake.
Highlighting Decision Windows
Slow motion also shows decision windows. The brief moments when a player has multiple options and must choose one. Pause at that moment and ask the player: “What do you see here? What are your options?”
If the player chose poorly, forced a pass into traffic instead of chipping it behind the defense, rewind, pause again, and show the open option they missed. The visual evidence makes the lesson stick.
How to Use Frame by Frame in Meetings
In a team meeting, use slow motion and freeze frame to walk through one or two key plays in detail. Don’t overdo it. Players will tune out if you step through every shift. Reserve frame by frame for the most important teaching moments.
Show the play at full speed first so players see it as it happened. Then slow it down or step through it, pausing at the critical decision. Annotate the freeze frame with a line, circle, or arrow showing what should have happened. Then show the play again at full speed so players see the complete sequence.
Example: “Watch this zone entry at full speed. Now let’s slow it down. Freeze. Right here, the middle lane is open. Circle. That’s your pass. If you hit that, it’s a two on one. Let’s watch it again full speed and see what actually happened.”
Individual Skill Development
Frame by frame is invaluable for individual skill work. If a player is struggling with shot release, pull three or four clips of their shots and step through each one. Compare their mechanics to a high level player doing the same shot. The differences, hand position, weight transfer, follow through, become obvious.
For goalies, frame by frame shows positioning, angles, and recoveries in detail. Step through a breakaway frame by frame to show when the goalie committed, how they tracked the puck, and whether they were square to the shooter.
Practical Limits
Don’t step through an entire shift frame by frame. It’s tedious and counterproductive. Use frame by frame only for the moments that matter. The decision point, the technique breakdown, the split second error.
Full speed context matters. Always show the play at full speed before and after stepping through it slowly. Players need to see how the slow motion moment fits into the flow of the game.
Frame by frame and slow motion turn invisible moments into teachable ones. Use them to isolate decisions, diagnose technique, and show players exactly when and why something went right or wrong.
Telestration: Making the Invisible Visible

A player watches a clip and nods. You explain the positioning error. The player nods again. Two days later, the same mistake happens on the ice.
Why? Because the player didn’t actually see what you were talking about. Verbal instruction alone is too abstract. Telestration, drawing directly on video, removes the ambiguity.
What Telestration Does
Telestration tools let you add lines, circles, arrows, and text directly onto video frames. You draw the passing lane that was open. You circle the space a player should have occupied. You trace the route a forechecker should have taken. The visual annotation makes your coaching point impossible to misunderstand.
Example: You’re coaching a weak side winger who keeps getting caught too deep on the rush, leaving the back door open. Show the clip. Pause. Draw a circle around where the winger is standing. Draw another circle ten feet higher
Final Words
You’re watching the third, rewinding the same shift where the D loses gap control. This post walked you through a clear process: set coaching objectives, tag key moments, spot recurring patterns, and turn clips into focused practice tasks.
We hit what to watch — offensive reads, puck support, first passes, and net-front battles — and how to share simple clips with players so they actually improve.
Use this as your checklist for how to analyze hockey game film for coaches. Do it consistently and the habits show up on the ice.
FAQ
Q: What are the 4 C’s of coaching hockey?
A: The 4 C’s of coaching hockey are competence, confidence, connection, and character. They mean skill and systems, player belief, team relationships, and work ethic/accountability you coach and measure.
Q: What is the 80 20 rule in hockey?
A: The 80 20 rule in hockey applies the Pareto principle: prioritize the 20% of actions, like first pass, puck support, and gap control, that create about 80% of positive game results.
Q: How to analyse a hockey game?
A: To analyse a hockey game, track structure, puck management, zone entries/exits, special teams, and repeated mistakes. Note patterns, count events per shift, and tag adjustments for practice or coaching.
Q: Can you wear 69 in NHL?
A: You can wear 69 in the NHL. There’s no league-wide ban, but teams usually avoid issuing that number and most clubs won’t approve it because of its crude connotation.